7 Plant Styling Tricks That Make a Room Feel Instantly Finished
How to place and pot plants like a designer, not an afterthought
A designer friend once walked into my living room, which I genuinely thought was done, and went straight for the plants without saying anything about the furniture, the art, or the rug I'd spent weeks choosing. She moved one plant off the floor onto a stool, swapped two nursery pots for matching ceramic ones already sitting unused in my kitchen cabinet, and pulled the tallest plant slightly away from its two shorter neighbors. Four minutes, zero purchases, and the room suddenly read as considered instead of just furnished.
None of what she did involved buying a single new plant. Every plant I already owned was fine, good, even, on its own. What had been missing wasn't more greenery, it was a handful of specific placement and potting decisions that most people, myself included, never think to make deliberately.
A quick note before we start: a few of the stories ahead are shared as told to me directly, and a few are offered as illustrative examples to make a principle easier to picture, I've tried to be clear about which is which rather than presenting every anecdote as independently verified. A practical note on scope: every trick here works whether your plants are real, faux, or a mix of both, styling principles don't care which one is actually alive.
Here are the seven changes that actually made the biggest difference, why each one works from a design standpoint, and how to adapt them if you're working with just a few plants in a small or rented space.
Table of Contents
- Vary the Heights in Every Grouping
- Group in Odd Numbers, Not Matching Pairs
- Swap the Nursery Pot for One Cohesive Container
- Let the Plant's Natural Shape Pick Its Spot
- Elevate at Least One Plant Off the Floor
- Mix Leaf Textures, Not Just Plant Sizes
- Choose One Statement Plant Before Adding Smaller Ones
- Why These Small Adjustments Make a Room Feel "Finished"
- Deciding Real vs. Faux for Each Spot
- Adapting These Tricks for a Small or Rented Space
- Common Plant Styling Mistakes
- Which Tricks to Do First If You Only Have a Few Plants
- What These Tricks Actually Cost
- Common Questions
Vary the Heights in Every Grouping
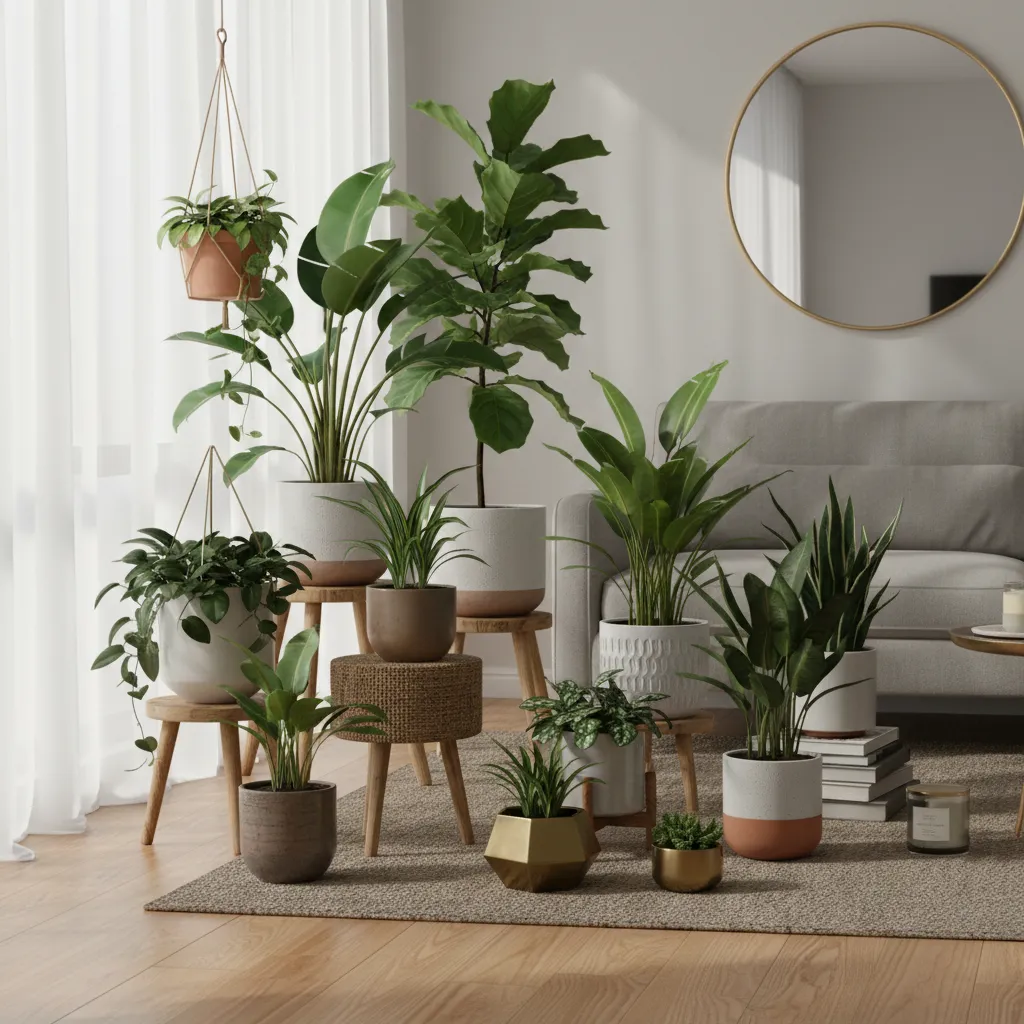
Three plants of roughly the same height lined up on a shelf read as flat and static, even if each one individually looks healthy and well chosen. The eye has nothing to travel along, no rhythm to follow, just a repeated shape. Designers deliberately break that repetition by making sure no grouping has two plants sitting at exactly the same visual height.
- Pick a grouping spot, a shelf, a windowsill, a console table, and select at least three plants of clearly different heights.
- Position the tallest plant slightly toward the back or to one side rather than dead center of the group.
- If your plants happen to be similar in actual size, use risers or stacked books under one or two of them to manufacture the height difference.
- Step back several feet and check that the silhouette of the group reads as a rough triangle rather than a flat line.
- Adjust one plant at a time rather than rearranging the whole group repeatedly, small shifts are usually enough.
- Gives the eye a path to follow instead of a flat, repeated shape
- Makes a grouping look considered without needing new plants
- Works identically whether the plants are real or faux
Search terms: "plant stands varying heights," "wood plant riser," "tiered plant stand"
Group in Odd Numbers, Not Matching Pairs

A matching pair of identical plants flanking a sofa or mirror seems like the safer, more polished choice, and initially it can look put together. But a perfectly even, symmetrical pair tends to read as formal and slightly stiff in most casual living spaces, while a loose group of three, deliberately uneven, almost always reads as more intentional and less like a display.
- Choose groupings of three or five wherever possible, rather than two or four.
- Vary the pot style or plant type slightly within the group instead of choosing identical items throughout.
- Cluster the plants asymmetrically, closer together on one side, rather than spacing them evenly apart.
- Keep one deliberate "odd one out" element in the group, a different texture or pot color, so it doesn't read as an accidental matched set.
- Step back and check that the grouping feels gathered rather than lined up in a row.
- Reads as gathered and intentional rather than displayed
- Suits most casual, lived-in rooms better than strict symmetry
- Easy to apply to plants you already own, without buying a matching set
Search terms: "mixed ceramic plant pots set," "varied plant pot collection"
Swap the Nursery Pot for One Cohesive Container
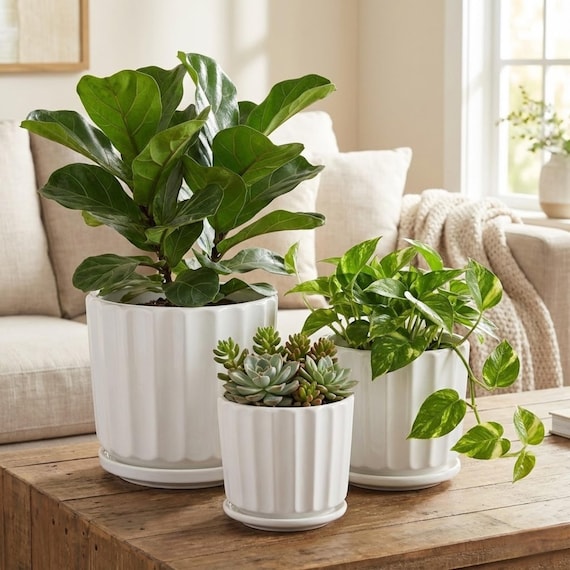
A living room can have thoughtfully chosen furniture, art, and a rug, and still feel unfinished if every plant is sitting in the black plastic pot it came home from the store in. It's one of the most common styling gaps, and also one of the fastest to fix, since it usually takes an afternoon rather than a full redecorating project.
- Measure the nursery pot's diameter and height before choosing a decorative container.
- Choose a cachepot, a decorative outer pot with no drainage hole, sized to slip the nursery pot directly inside rather than repotting the plant itself.
- Pick one or two material families across the whole home, all terracotta, all ceramic, or a deliberate mix of just two, rather than a different style for every plant.
- Add a layer of moss over the visible nursery pot rim if there's a noticeable gap between it and the cachepot.
- Repeat across every visible plant in a room in one sitting, rather than doing it piecemeal over months.
- Removes the single most common "unfinished" signal in a plant-filled room
- Doesn't require repotting or risking the plant's roots
- Creates visual cohesion across an entire room in one afternoon
Search terms: "ceramic cachepot no drainage," "decorative plant pot cover," "terracotta plant pot set"
Let the Plant's Natural Shape Pick Its Spot
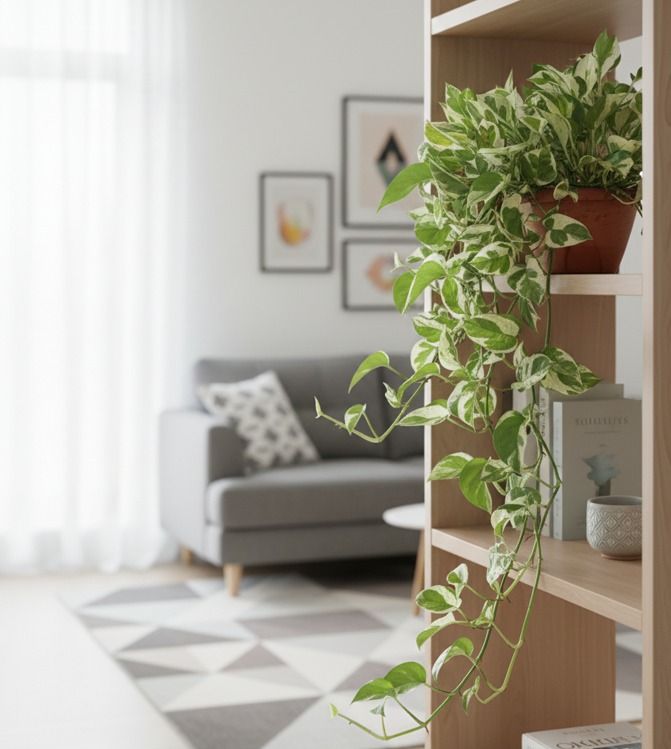
A trailing pothos placed in a tall floor planter just puddles unattractively on top of the soil, since it has nowhere to actually trail. An upright snake plant hung from the ceiling looks equally wrong, its rigid, vertical leaves were never meant to dangle. Every plant has a natural growth habit, and fighting it is one of the quieter reasons a styled space can still feel slightly off.
- Identify whether each plant grows upright, trailing, or arching before deciding where it goes.
- Place upright plants (like snake plant or rubber plant) on the floor or a low shelf, where their vertical line reads clearly.
- Place trailing plants (like pothos or ivy) on a high shelf, mounted planter, or hanging basket where the vines can actually cascade downward.
- Reserve tabletop and low surface spots for compact, rounded plants rather than tall or trailing ones that will look cramped there.
- Reassess any plant that looks visually "stuffed" into its spot, that's usually a sign the shape doesn't match the placement.
- Lets each plant's natural form actually be visible, rather than fighting against its placement
- Prevents the subtle "something's off" feeling of a plant crammed into the wrong spot
- Applies identically to faux plants, since they're built to mimic the same natural habits
Search terms: "hanging planter macrame," "wall mounted plant shelf," "tall floor planter"
Elevate at Least One Plant Off the Floor
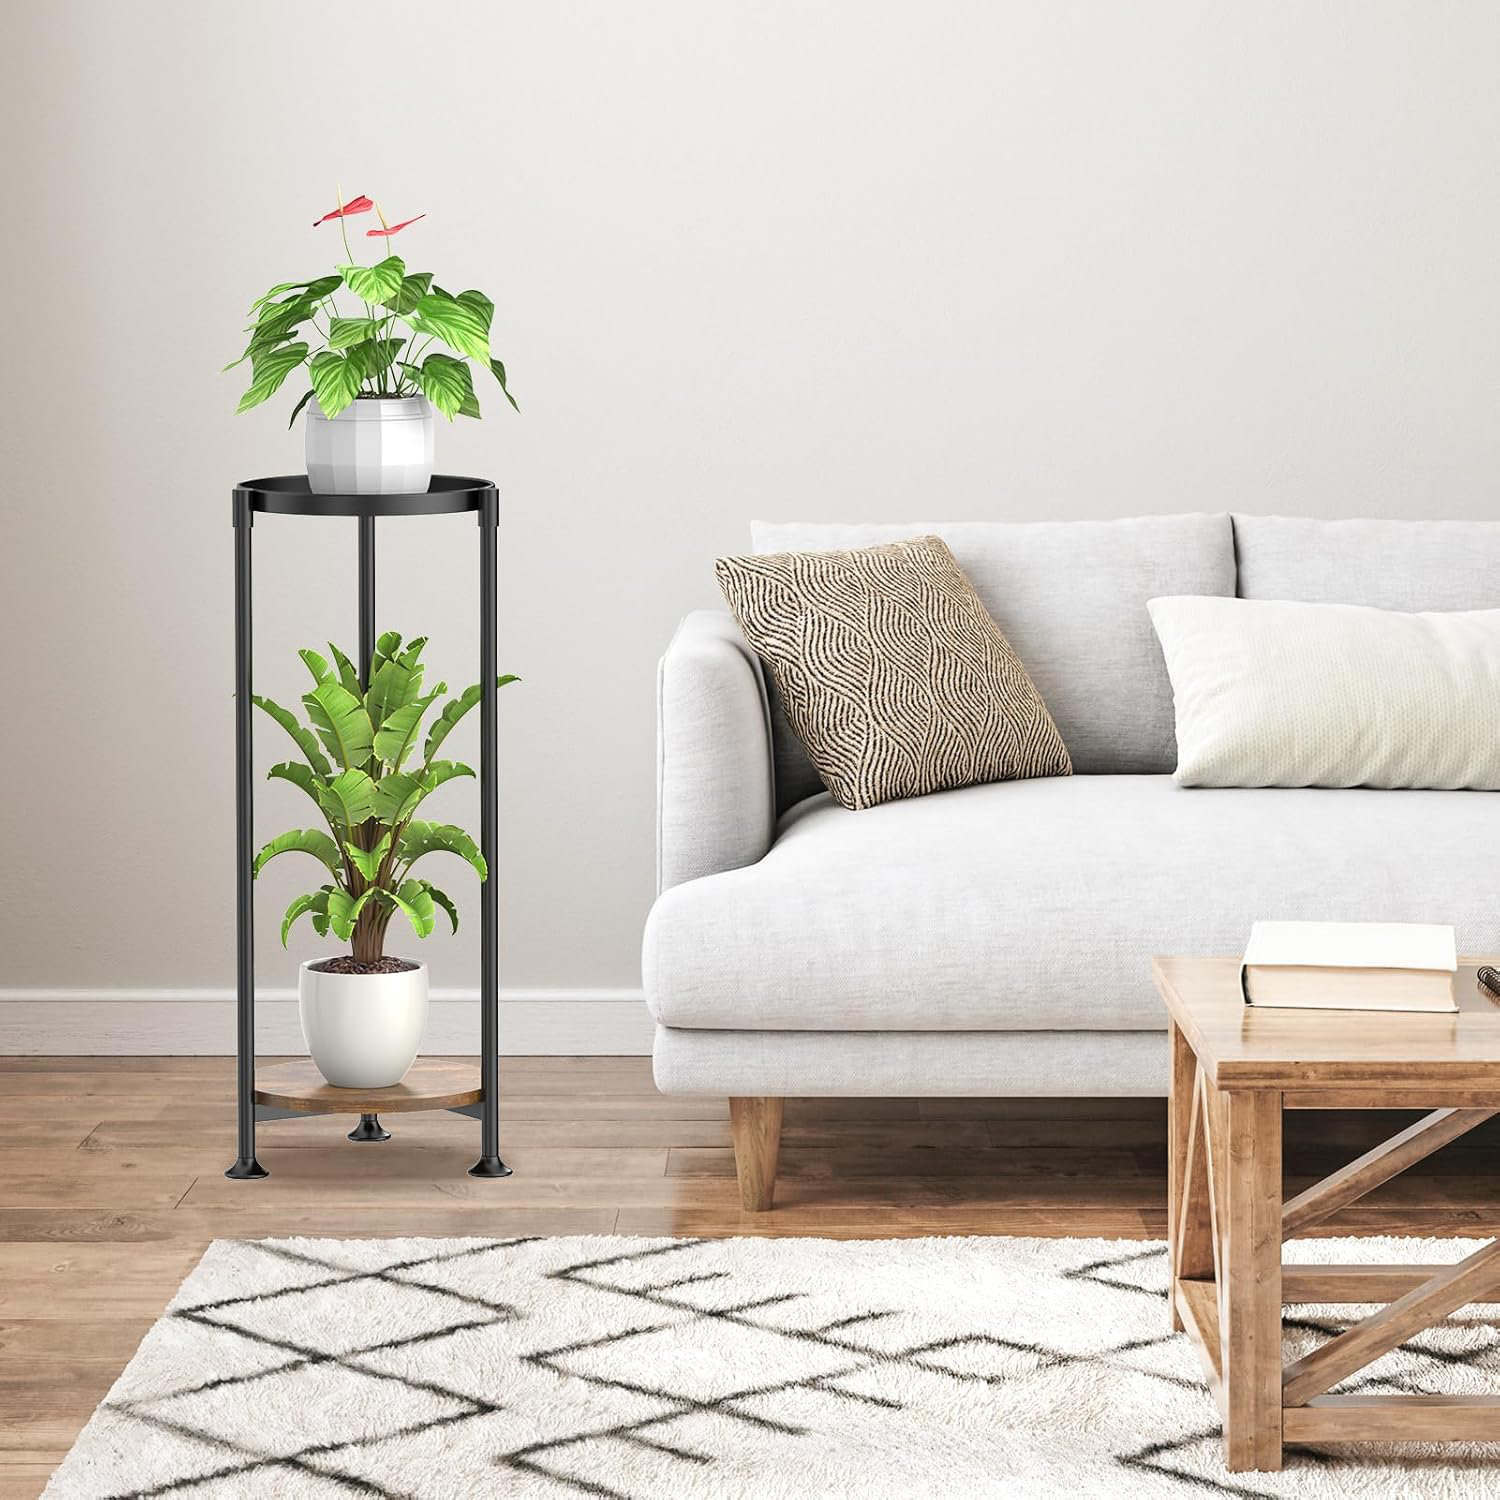
A room where every larger plant sits directly on the floor can start to feel visually heavy at the bottom, even if the plants themselves are attractive. Lifting just one of them onto a stand, stool, or plinth introduces a break in that line that draws the eye and reads as noticeably more deliberate.
- Choose one plant per grouping or room to elevate on a stand, stool, or plinth rather than leaving it on the floor.
- Pick a stand height that puts the plant's foliage at a noticeably different level than its neighbors, not just an inch or two higher.
- Favor a stand material that echoes something else already in the room, matching wood tones or a matte black finish to existing fixtures.
- Avoid elevating every plant in the room, the effect relies specifically on the contrast between floor-level and elevated pieces.
- Check the stand's stability with the pot's actual weight before finalizing the placement.
- Breaks up a visually flat, floor-level line across a room
- Brings a plant's foliage closer to eye level where it's actually appreciated
- One of the fastest single changes on this list if you already own a stool or side table
Search terms: "wood plant stand mid century," "plant stool ceramic," "plant plinth stand"
Mix Leaf Textures, Not Just Plant Sizes

A grouping of three plants that all happen to have broad, glossy leaves can look repetitive even when their pots and heights are already varied. Swapping just one for a fine, feathery-leaved plant introduces a contrast that makes the whole grouping suddenly look deliberate rather than simply repeated.
- Identify each plant's leaf texture broadly: broad and glossy, fine and feathery, spiky and architectural, or small and rounded.
- Aim for at least two different texture categories within any grouping of three or more plants.
- Pair one bold, broad-leaf plant with one fine-textured plant for the clearest contrast.
- Lean on texture contrast especially in groupings where height and pot style are already fairly similar.
- Avoid combining more than three distinct textures in one small grouping, which can start to look cluttered rather than intentional.
- Adds visual interest even within an all-green plant collection
- Makes an existing grouping look more curated without adding more plants
- Works especially well in groupings where height variation alone isn't enough
Search terms: "boston fern plant," "snake plant tall," "fiddle leaf fig small"
Choose One Statement Plant Before Adding Smaller Ones

Someone building a plant collection over time can end up with five or six small plants scattered around a living room, hoping the cumulative effect reads as an intentional indoor jungle. Often it just reads as scattered, right up until one large, dramatic floor plant is added as an anchor, after which the same smaller plants suddenly read as supporting pieces rather than a random collection.
- Choose one plant per main room to serve as the visual anchor, large enough to read as a piece of furniture rather than an accessory.
- Place it in a spot with some existing visual weight, near a window, beside a sofa, or in an empty corner.
- Arrange smaller plants as supporting pieces around or near the anchor, rather than scattered independently around the room.
- Resist adding a second large statement plant to the same room, which competes with the first instead of supporting it.
- Let the anchor plant's height and texture guide the height and texture choices (Tricks 1 and 6) for everything placed near it.
- Gives an entire room a single visual reference point everything else relates to
- Turns a scattered collection of small plants into a coherent, styled arrangement
- Works equally well with a faux statement piece, which is often the more practical choice for this role
Search terms: "large fiddle leaf fig tree," "bird of paradise plant tall," "large snake plant floor"
Why These Small Adjustments Make a Room Feel "Finished"
It's worth understanding why a room can be fully furnished and still feel slightly unresolved until plants are styled deliberately. A room "reads" visually through a small number of focal points and supporting details, when every element, plant height, pot style, floor placement, is left uniform, the eye has nothing to organize the space around, which registers as flat or unfinished even if nothing is technically wrong. Introducing variation, in height, in numbers, in texture, in one elevated piece against several grounded ones, creates a visual rhythm the eye can follow and rest on. This is the same underlying principle behind why designers favor asymmetry and grouping across furniture and objects generally, plants simply make it easiest to see, since they're often the last layer added to an otherwise finished room, and the first place these small adjustments show up clearly.
Deciding Real vs. Faux for Each Spot
Once a room has a clear anchor plant (Trick 7) and a few supporting pieces, it's worth deciding deliberately which should be real and which should be faux, rather than defaulting to one or the other everywhere. A large statement anchor is often a strong candidate for faux, since these dramatic plants are frequently placed in a spot chosen for its visual impact rather than its light levels, and a faux version guarantees it looks full and healthy indefinitely regardless of how much natural light actually reaches that corner. Smaller accent and trailing plants near an actual window are usually worth keeping real, since they're often close enough to be touched or examined, where up-close texture (Trick 6) matters more, and since a spot with genuine light supports them easily. Mixing real and faux within the same grouping also tends to make both read as more convincing, a faux plant benefits from the credibility of its real neighbors, and a real plant's imperfections read as less noticeable next to a consistently full faux one.
Adapting These Tricks for a Small or Rented Space
All seven tricks scale down easily for a small apartment or a rental where drilling or major purchases aren't an option. Height variation (Trick 1) works with stacked books instead of a purchased riser. Odd-numbered grouping (Trick 2) applies just as well to three small plants on a single windowsill as it does to a large floor arrangement. Cachepots (Trick 3) require no repotting or commitment, ideal for a space you don't plan to stay in long-term. Elevating a plant (Trick 5) can use a stool or side table you already own rather than a dedicated stand. And the statement anchor plant (Trick 7) can simply be scaled down, a medium plant genuinely large relative to a small room still reads as an anchor, the effect is about relative scale within the space, not an absolute size requirement.
Common Plant Styling Mistakes
- Buying plants without a plan for height variation: ending up with several similarly sized plants and no way to create visual rhythm without additional stands or risers.
- Leaving every plant in its mismatched nursery pot: undermining an otherwise well-decorated room with visible plastic growing pots.
- Placing every plant on the floor at the same level: creating a visually flat, heavy line across the bottom of a room.
- Choosing plants for color or species alone: without considering leaf texture, resulting in a grouping that looks repetitive despite other variations.
- Scattering many small plants with no single anchor piece: leaving even a large plant collection reading as random rather than styled.
Which Tricks to Do First If You Only Have a Few Plants
- 1. Swap nursery pots for cohesive cachepots — the fastest visual upgrade, and it requires no new plants at all.
- 2. Vary heights using stands or risers you already own — immediate rhythm without any purchases.
- 3. Elevate one plant — introduces contrast against the rest sitting at floor level.
- 4. Add a single anchor plant if budget allows — gives the room a genuine focal point to build around.
- 5. Mix textures on your next plant purchase — the easiest trick to apply gradually rather than all at once.
The remaining two tricks, matching plant shape to placement and choosing odd-numbered groupings, cost nothing and can be applied to plants you already own the next time you rearrange a room.
What These Tricks Actually Cost
| Trick | Typical Cost |
|---|---|
| Cachepots (per plant) | $10–30 |
| Plant riser or small stand | $10–25 |
| Taller plant stand or stool | $25–60 |
| Hanging or wall-mounted planter | $15–35 |
| One additional textured accent plant | $15–40 |
| Medium statement anchor plant (faux) | $50–130 |
| Applying all seven to a small room | Around $100–200 total |
Common Questions
Do I need a lot of plants for these tricks to work? No, most work with as few as three plants, this is about arrangement and placement, not quantity.
Does this work with fake plants too? Yes, all seven tricks apply identically to faux plants, style them exactly the way you would real ones.
How many plants is "too many" for one room? There's no fixed number, the earlier mistakes, mismatched pots, no anchor piece, uniform height, matter more to how a room reads than plant count alone.
Can I do this without buying anything new? Yes, pot swapping with items you already own, height variation using books or stools, and rearranging into odd-numbered groupings cost nothing beyond a bit of rearranging.
A room that feels instantly finished was never actually about owning more plants. Every trick here proves the same point: a handful of specific placement and potting decisions does more real work than adding another plant to an already scattered collection.
Start with the free one tonight, move just one plant off the floor and onto a stool or side table, and notice how differently the same room reads by morning.
Shop the Story
- wood plant riser
- ceramic cachepot no drainage
- hanging planter macrame
- wood plant stand mid century
- plant stool ceramic
- tiered plant stand
- wall mounted plant shelf
- tall floor planter
- mixed ceramic plant pots set
- large fiddle leaf fig tree