10 Dollar Store Finds That Look Custom-Made With One Simple Trick
Dollar store items transformed with a single styling trick
A friend of mine hosted a dinner party last spring that I genuinely complimented three separate times before she finally told me the truth. The gold-rimmed votive candles down the center of her table, the "ceramic" vases anchoring each end, the gallery of small framed botanical prints behind her sideboard, every single piece of it came from the dollar store. Total spend, by her own count afterward, was under thirty dollars. What she'd actually spent money and time on wasn't the objects themselves. It was one specific trick, applied consistently, to plain, cheap, mass-produced things.
That's the entire premise of this list, and it's worth being honest about upfront: a dollar store item, straight out of the package, almost always still looks like a dollar store item. The shine is too uniform, the color is too saturated, the proportions are slightly off in a way your eye clocks even if your brain can't name it. What changes all of that isn't a full DIY project or a specialized skill. It's one repeatable move, a specific paint, a specific technique, a specific styling choice, applied with a bit of restraint.
I want to be direct about something else too, since accuracy matters here as much as inspiration does: these aren't tricks I invented for this list. Every single one below is a real, currently circulating technique I checked against multiple independent sources, from budget decorating blogs to the actual creators posting these transformations, because a hack that only one person has ever tried is a guess, not a genuine method. Where sources described a specific supply, a specific paint finish, a specific sealant, I've kept that specificity rather than smoothing it into vague, generic advice.
One theme comes up again and again across every source I checked: the goal is never "crafty." The moment something looks like a school project, the illusion breaks. The actual goal, in nearly every case, is texture and finish that reads as expensive, matte stone, aged brass, real linen, real glass, rather than shiny, uniform, obviously-plastic dollar store sheen. Keep that single idea in mind as you read through the ten below, because it's the thread connecting all of them.
Here they are, roughly in order of how fast and foolproof each one is, starting with the single easiest transformation on the whole list.
Table of Contents
- Plain Glass Vases → Faux Stone Texture
- Mismatched Picture Frames → One Cohesive Gallery Wall
- Wire or Plastic Baskets → Matte Black Storage
- Glass Candle Holders → Gold Stenciled Elegance
- Small Frames or Trinket Trays → Antique Gold Patina
- Clear Glass Bottles → Frosted Glass Look
- Plastic Trays → Faux Marble Finish
- Uniform Faux Greenery → Realistic Trimmed Stems
- Plastic Picture Frames → Instant Drawer Dividers
- Plain Ceramic Containers → Decanted Apothecary Look
- Your Core Supply Kit
- Why This Actually Works
- Common Mistakes That Give It Away
- How the Ten Tricks Compare
- Which Trick to Try First
- Common Questions
Plain Glass Vases → Faux Stone Texture

Organic modern is one of the defining aesthetics right now, heavy texture, matte finishes, the look of real stoneware, and a plain dollar store glass vase is the single best starting object for faking it, because the shape already does half the work. Cylinder shapes and simple silhouettes read as intentionally minimal once the surface texture changes.
- Mix a small amount of baking soda into leftover acrylic paint or textured stone spray paint until it forms a thick, slightly gritty paste.
- Apply it to the glass vase in an even, textured layer, letting the mixture's natural unevenness show rather than smoothing it perfectly flat.
- Let it dry fully, this texture takes longer to cure than a thin spray coat, budget a full day.
- Optionally follow with a light coat of matte sealant to protect the surface from chipping.
- Mimics a genuinely expensive stoneware finish for the cost of paint you likely already own
- Texture, not color, is what actually sells the illusion
- Works on virtually any plain glass shape, bottles included
Search terms: "textured stone spray paint," "acrylic paint baking soda texture technique"
Mismatched Picture Frames → One Cohesive Gallery Wall

This is the trick that shows up, almost word for word, across nearly every independent source I checked, which tells you how consistently it actually works. Dollar store picture frames come in a dozen slightly mismatched finishes and styles. The fix isn't finding matching ones. It's making them match yourself.
- Buy as many frames in the same basic style and size range as the store has, uniformity of shape matters more than uniformity of original finish.
- Spray paint every single one the exact same color, matte black, antique gold, or warm white are the three most consistently recommended, timeless choices.
- Skip expensive prints entirely, download free, high-resolution art from sites like Unsplash, print it at home or at a local print shop, and use that instead.
- Hang the newly uniform frames together in a grid or loose cluster, the color consistency alone reads as a cohesive, professionally curated set.
- Solves an entire wall of decor for the cost of paint and a home printer
- The single most consistently cited, most reliable trick on this list
- Scales to fill any size wall, just buy more frames
Search terms: "matte black spray paint frames," "free printable wall art high resolution"
Wire or Plastic Baskets → Matte Black Storage
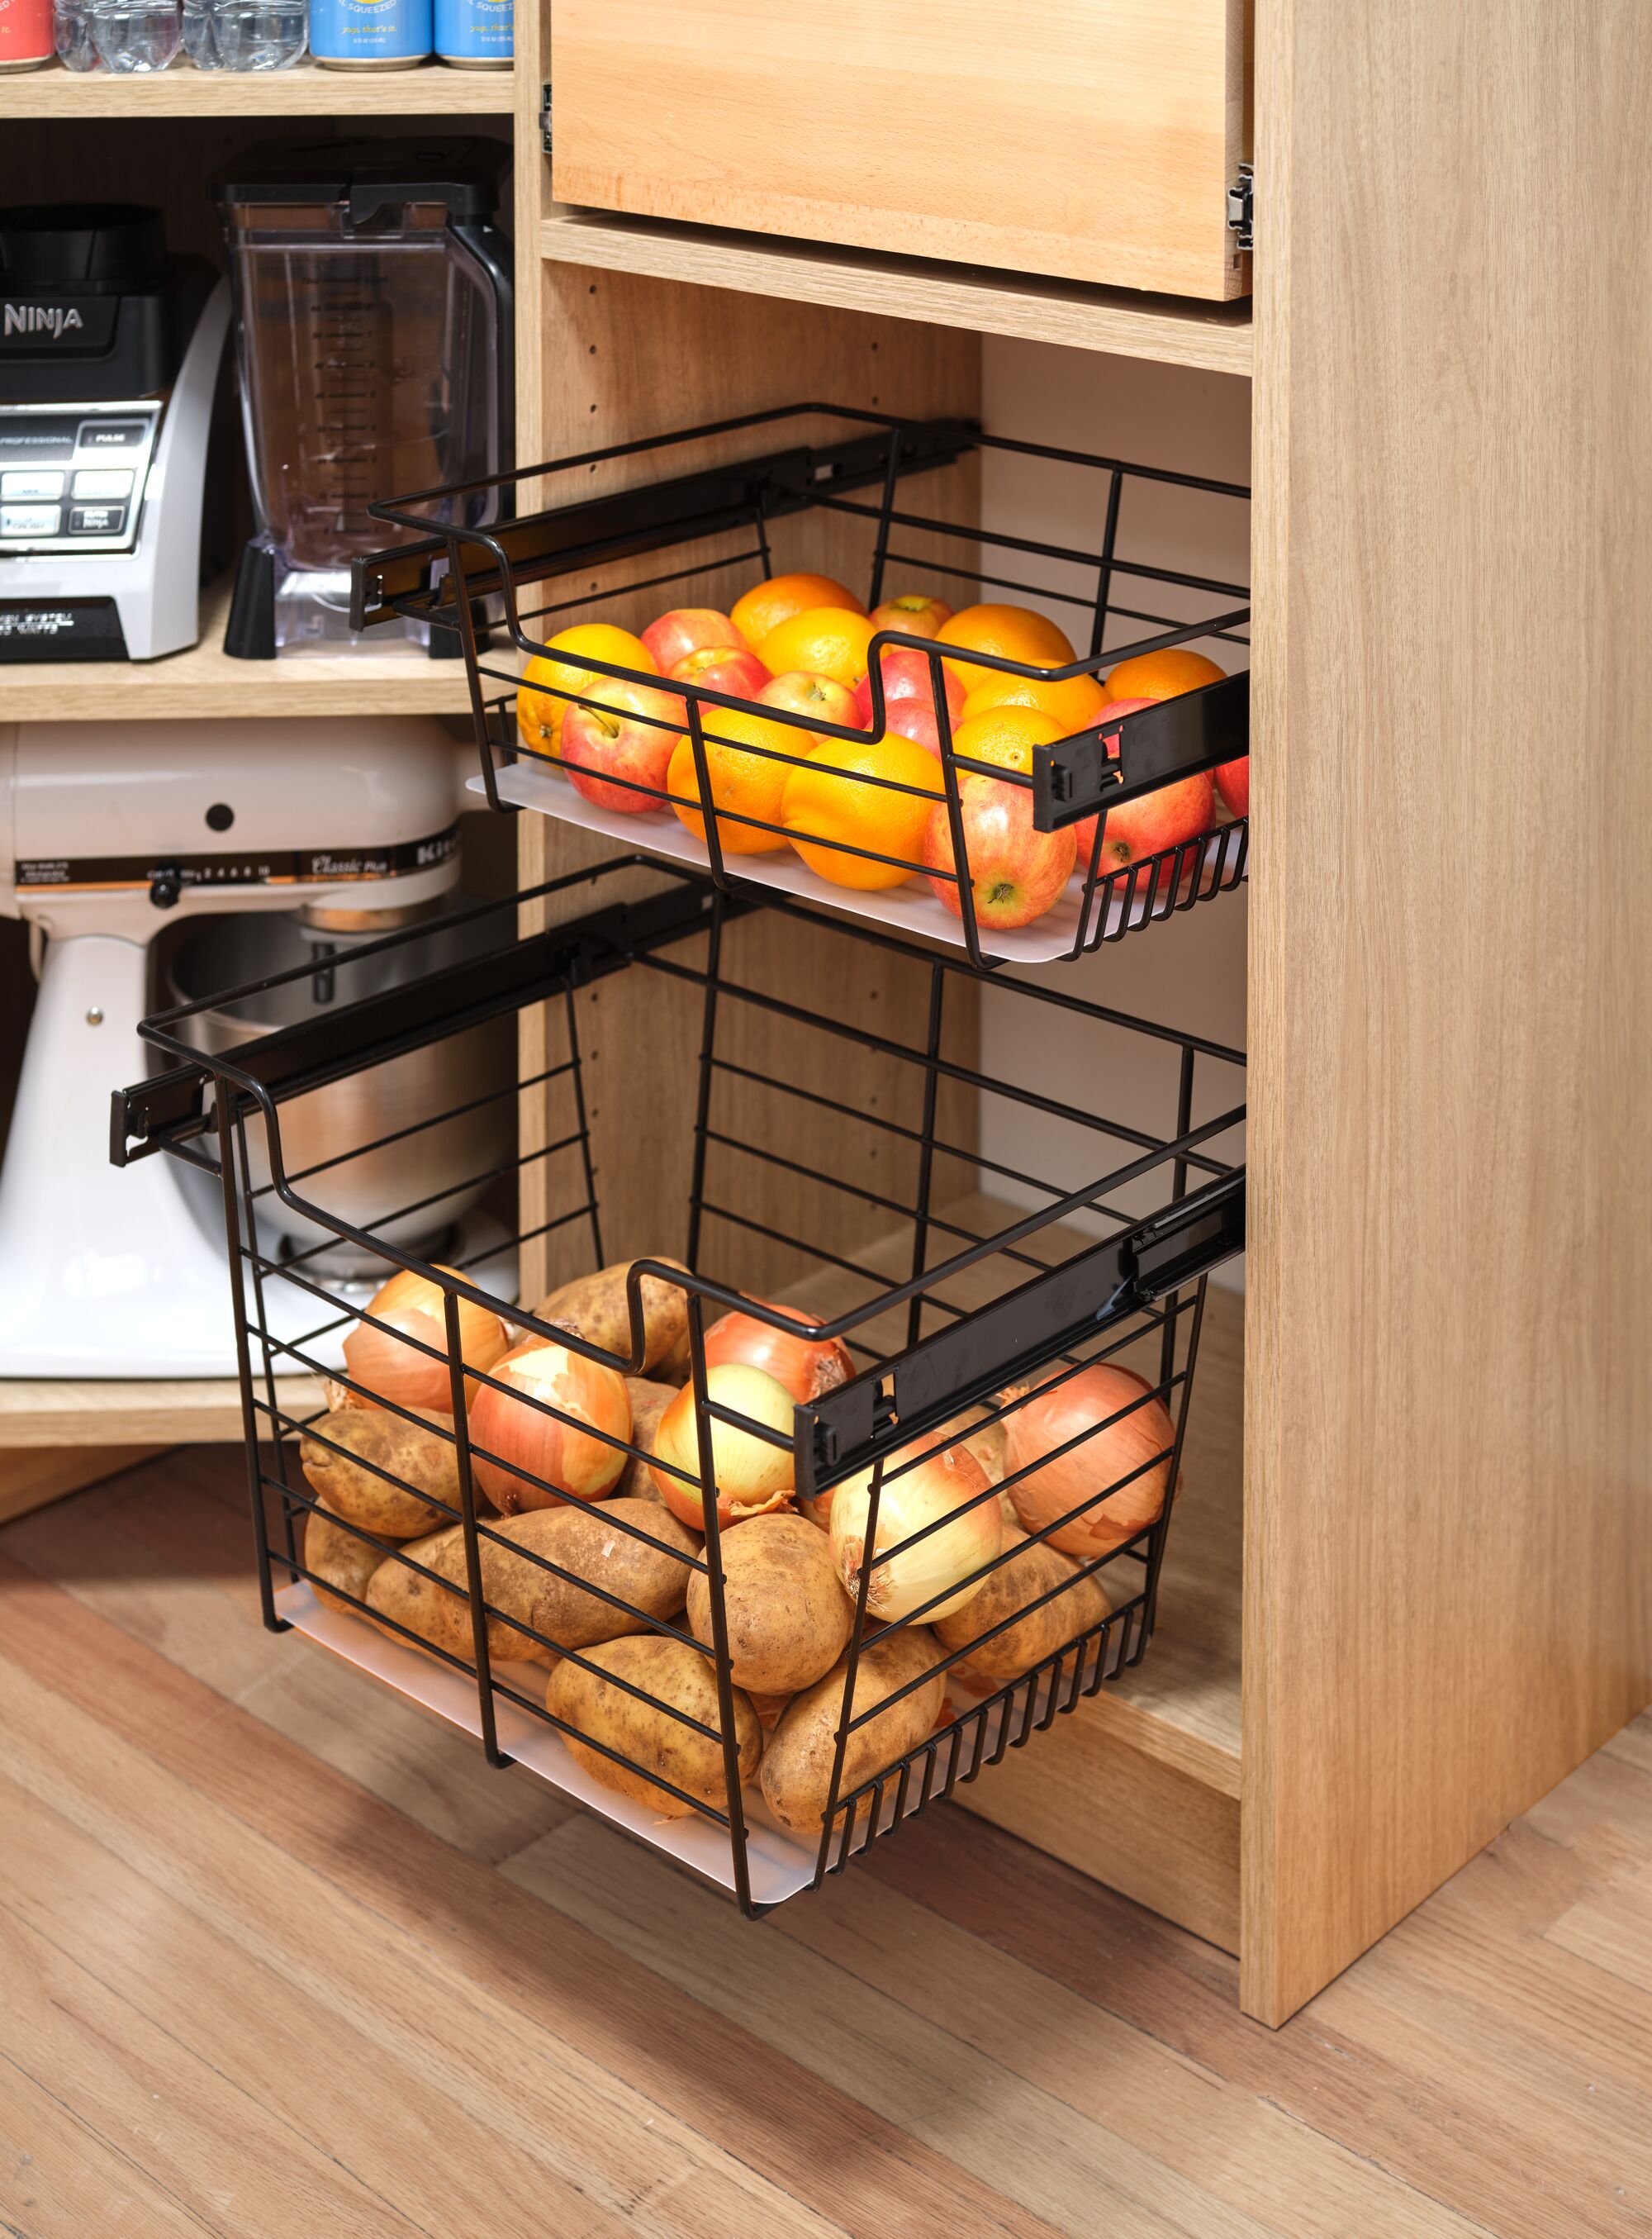
Bright, mismatched plastic bins are the fastest way to make a closet, pantry, or bathroom shelf look cluttered even when it's technically organized. A single, cheap fix, one consistent spray paint color, changes that instantly, and it's a trick that shows up repeatedly across dollar store decor guides specifically for storage.
- Spray-paint wire racks or plastic bins matte black, or another single, consistent tone that matches your existing hardware.
- Add simple labels, printed or handwritten on matching tags, for a genuinely custom, boutique-organizing look.
- Group two or three matching sizes together rather than scattering various sizes randomly across a shelf.
- Let the paint fully cure for at least 24 hours before loading bins with any weight.
- Instantly unifies a mismatched storage collection
- Labels plus consistent color reads as boutique organizing, not thrown-together bins
- Works on nearly any material, wire, plastic, or wicker
Search terms: "matte black spray paint storage bins," "chalkboard label tags"
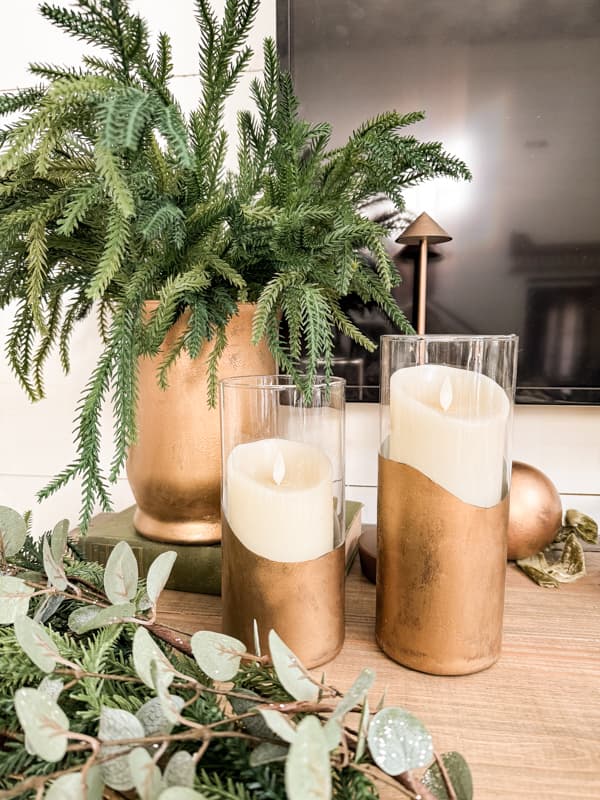
Glass Candle Holders → Gold Stenciled Elegance
This specific transformation shows up repeatedly in creator posts for exactly the reason it's included here: two plain dollar store glass candle holders and a can of gold spray paint, used with one small technique most people skip, produce a result that genuinely surprises people who see it in person.
- Cut a simple paper stencil, a straight band, a geometric shape, or a scalloped edge, and tape it firmly to the glass.
- Apply gold spray paint in thin, even coats directly over the stencil.
- Remove the stencil carefully while the paint is still slightly tacky for the cleanest edge.
- Let it cure fully before handling, gold spray paint on glass typically needs a full 24 hours to set properly.
- The stencil, not the paint alone, is what creates a polished, deliberate edge
- Transforms the cheapest, most generic glass shape on the shelf
- Groups beautifully in odd numbers down a table runner or mantel
Search terms: "gold metallic spray paint glass," "paper stencil DIY technique"
Small Frames or Trinket Trays → Antique Gold Patina

Rub 'n Buff, a wax-based metallic finish, is named specifically and repeatedly across sources as one of the small handful of products that genuinely transforms plastic into what looks like real, aged metal. It's the single product creators describe as an "essential" in this entire category of hacks.
- Choose an antique gold shade specifically, it reads as aged rather than shiny-new.
- Apply it with your finger, wearing a glove, or a soft cloth rather than a paintbrush.
- Work it on unevenly on purpose, more product in recessed detail areas, less on raised surfaces, to mimic a genuine collected-over-time patina.
- Buff lightly with a dry cloth once it sets for a soft sheen rather than a wet-looking finish.
- A single small tube produces an outsized number of transformations
- The uneven, hand-applied technique is what makes it read as genuinely aged
- Works on nearly any small plastic object, not just frames
Search terms: "Rub n Buff antique gold," "wax metallic finish for plastic"
Clear Glass Bottles → Frosted Glass Look
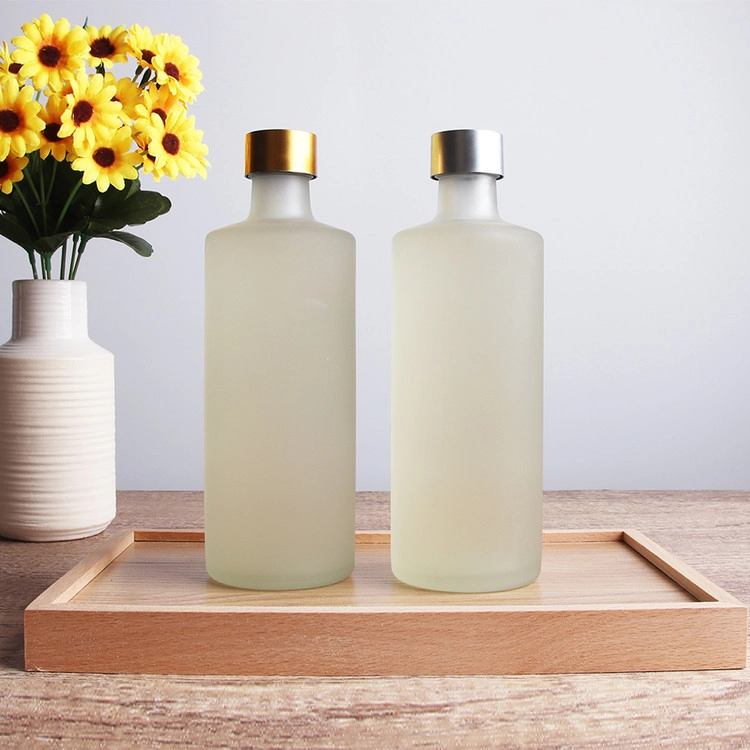
Plain glass, bottles, jars, cylinder vases, can look genuinely cheap under bright light specifically because the shine is so uniform and unbroken. Frosted glass spray paint solves that in one pass, and it's a specific, named product across multiple sources for exactly this reason.
- Clean and fully dry the glass surface before spraying, any residue shows through a thin frosted coat.
- Apply frosted glass spray paint in thin, even layers, building up gradually rather than one heavy coat.
- Hold the can at the manufacturer's recommended distance to avoid drips, which show up more visibly on frosted finishes than solid colors.
- Let each coat dry fully before adding the next, typically 10 to 15 minutes between coats.
- Diffuses harsh light the way genuine etched or frosted glass does
- Works on any clear glass shape already in your recycling bin
- Available at most craft stores for under $5
Search terms: "frosted glass spray paint," "etched glass finish spray"
Plastic Trays → Faux Marble Finish

Real marble trays and soap dishes cost a genuine premium, and the marbling paint technique is specifically named across sources as working just as well on a small plastic tray or ceramic soap dish as it does on larger surfaces, for a fraction of the cost.
- Apply a base coat in white or your chosen background tone and let it dry fully.
- Use a feather, thin brush, or specialized marbling technique to add thin, veined lines in gray or gold across the surface.
- Keep the veining irregular and sparse, real marble veining is asymmetrical and varies in thickness, not evenly repeated.
- Seal the entire finished surface with a waterproof topcoat, this single step is what keeps the effect from wearing away with daily use.
- Mimics genuinely expensive marble for the cost of paint and a sealant
- The sealant step is what makes it durable enough for daily bathroom or kitchen use
- Works on soap dishes, trays, and even small coasters
Search terms: "faux marble painting technique," "waterproof clear topcoat spray"
Uniform Faux Greenery → Realistic Trimmed Stems

This is the only trick on the list that requires no product purchase at all, just your hands, and it's specifically named across sources as the fix for the single biggest tell of dollar store faux greenery: it comes out of the package looking too perfect and too uniform to pass as real.
- Remove individual leaves or stems from the main bundle rather than keeping the whole cluster intact.
- Bend each stem by hand at a few points, real stems bend and curve, they don't stay perfectly straight.
- Trim uneven lengths across a grouped arrangement, exact uniformity is the single biggest giveaway.
- Re-space leaves along each stem, thinning out overly dense clusters for a more natural, irregular growth pattern.
- Completely free, using only stems you already bought
- Directly fixes the exact detail that makes faux greenery look fake
- Takes minutes per stem with zero supplies required
Search terms: "realistic faux greenery styling tips," "dollar tree faux plant stems"
Plastic Picture Frames → Instant Drawer Dividers
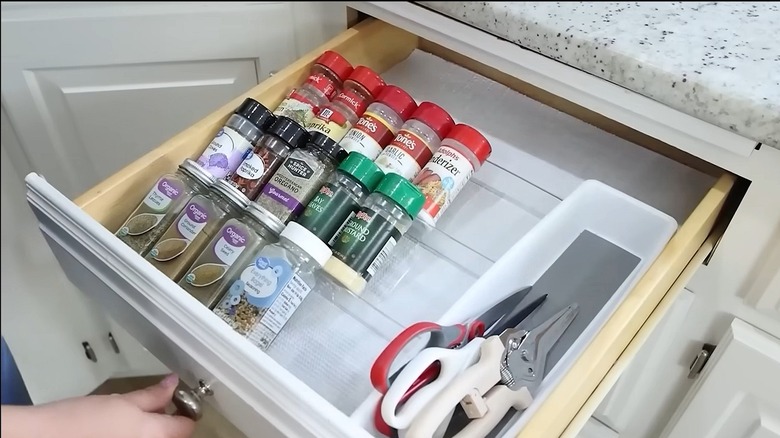
This is the trick that surprises people most, precisely because it repurposes an object for something entirely unrelated to its intended use. Cheap plastic picture frames, laid face down in a drawer, instantly become compartments, no cutting, gluing, or tools involved.
- Measure your drawer's interior dimensions before choosing frame sizes.
- Lay several $1.25 plastic frames face down inside the drawer, using their raised backing as natural dividing walls.
- Arrange different frame sizes to create a mix of larger and smaller compartments.
- Adjust the layout as needed, this setup requires no permanent attachment, so it's easy to rearrange.
- Costs almost nothing compared to purpose-made drawer organizers
- Fully adjustable and reconfigurable at any time
- Works in vanity drawers, desk drawers, and kitchen utensil drawers alike
Search terms: "dollar tree drawer organizer hack," "cheap picture frame drawer divider"
Plain Ceramic Containers → Decanted Apothecary Look

The final trick on this list involves no paint, no technique, and no tools at all, just a decision. Plain dollar store jars, bottles, and pump dispensers, filled with the actual product from its original ugly packaging, instantly read as a considered, apothecary-style bathroom or pantry.
- Choose simple, uniform glass or ceramic containers, matching pump dispensers for liquids, lidded jars for dry goods.
- Decant the actual product directly from its original packaging into the new container.
- Label containers if the contents aren't visually obvious, simple handwritten or printed tags work well.
- Choose one consistent container style across an entire shelf or counter for the strongest visual impact.
- Requires zero crafting skill or supplies beyond the containers themselves
- Instantly unifies a shelf of mismatched product packaging
- The exact technique behind the popular "apothecary bathroom" aesthetic
Search terms: "glass soap dispenser set," "apothecary jar bathroom storage"
Your Core Supply Kit
Nearly every trick on this list draws from the same small handful of supplies, worth keeping on hand rather than buying fresh for every project:
- Matte black spray paint. The single most versatile finish across frames, baskets, and hardware.
- Metallic gold spray paint. For candle holders, stenciled accents, and any "elevated" finish.
- Rub 'n Buff (antique gold). A tiny tube that lasts through dozens of small detail projects.
- Textured stone spray paint or baking soda. For faux pottery and stoneware finishes on glass.
- Frosted glass spray paint. For any clear glass object that reads as too shiny or cheap.
- A waterproof clear sealant. Non-negotiable for anything that will see regular handling or moisture.
- Painter's tape and paper for stencils. Clean edges are what separate "polished" from "crafty."
Why This Actually Works
Every trick on this list is solving the same underlying problem from a slightly different angle: mass-produced, budget objects signal "cheap" through a specific, learnable set of visual cues, uniform glossy sheen, perfectly even color, unnaturally symmetrical shapes, and mismatched finishes sitting side by side. None of those cues are about the object's actual cost or material. They're about texture, consistency, and finish, all of which are entirely fixable with paint, technique, and a bit of restraint.
That's also why "crafty" results happen when people skip a step, usually the stencil, the sealant, or the deliberate unevenness that mimics how a real aged or natural object actually looks. A perfectly smooth, perfectly even coat of gold paint reads as fresh paint. An intentionally uneven one, applied by hand and buffed afterward, reads as decades of collected patina. The technique is doing exactly the same amount of work either way, the difference is whether it's applied with an eye toward realism or just toward coverage.
Common Mistakes That Give It Away
- Skipping the sealant. Beautiful faux finishes wear off fast without a waterproof topcoat on anything handled regularly.
- Painting too thick in one coat. Thin, even layers consistently outperform one heavy coat, on glass especially.
- Perfect symmetry on "aged" finishes. Real patina and real marble veining are irregular; forcing even symmetry undoes the illusion.
- Mixing too many different "upgraded" finishes in one space. Pick one or two techniques per room rather than combining faux marble, faux stone, and gold patina all at once.
- Rushing dry time. Handling a piece before it's fully cured is the single most common way a good transformation gets ruined at the last step.
How the Ten Tricks Compare
| Trick | Difficulty | Typical Cost |
|---|---|---|
| Faux stone vases | Easy | Under $3 |
| Cohesive gallery frames | Easy | $8–$14 |
| Matte black storage | Easy | $6–$9 |
| Gold stenciled candle holders | Moderate | $5–$8 |
| Antique gold patina | Moderate | $6–$10 |
| Frosted glass bottles | Easy | $4–$7 |
| Faux marble trays | Moderate–Hard | $6–$10 |
| Trimmed faux greenery | Easy | Free |
| Drawer divider frames | Easiest | $5–$10 |
| Decanted containers | Easiest | $1.25–$5 each |
Which Trick to Try First
If you're only trying one thing this week, start with the trimmed faux greenery or the decanted containers, both are entirely free beyond what you may already own, and both deliver a genuinely visible change in under ten minutes. If you're ready to reach for a can of spray paint, the cohesive gallery wall frames give the single biggest visual payoff relative to effort, and it's the trick most consistently praised across every source checked for this list.
Common Questions
Do I need a well-ventilated space for the spray paint projects? Yes, always work outdoors or in a well-ventilated garage with a drop cloth, spray paint fumes and overspray both require real ventilation regardless of the project's small scale.
How long do these transformations actually last? With a proper sealant on anything handled regularly, most of these hold up for a year or more; the faux greenery and decanting tricks have no wear timeline since no paint is involved.
Can I combine several of these tricks in one room? Yes, and it's how the most convincing rooms are built, a cohesive gallery wall, a few faux stone vases, and decanted bathroom containers all draw from the same restrained, matte, natural-material visual language.
Is Rub 'n Buff safe to use on items that will be handled often? Once it's fully cured and lightly buffed, it holds up well to normal handling; avoid it on surfaces that will be repeatedly wet, like a shower caddy, without a protective sealant on top.
What's the single biggest thing that separates a convincing result from an obviously DIY one? Restraint and finish consistency. The projects that look custom-made use one technique applied carefully and evenly, not several competing effects layered onto the same object.
My friend's dinner party table was never really about the dollar store. It was about one trick, applied with actual care, to objects most people walk past without a second look. That's the whole secret this entire list is built on: the material was never the expensive part. The technique was.
Pick the one trick that matches something you already own, a plain vase, a mismatched frame, a bottle in your recycling bin, and try it this weekend before buying anything new at all. That's the fastest way to see this actually work.
Shop the Story
- textured stone spray paint
- matte black spray paint frames
- gold metallic spray paint glass
- Rub n Buff antique gold
- frosted glass spray paint
- waterproof clear topcoat spray
- glass soap dispenser set
- apothecary jar bathroom storage