8 Media Console Styling Fixes That Make a TV Stand Look Finished
The specific fixes that turn a shelf of black equipment into a genuinely designed piece of furniture
My media console was, for years, exactly what its name suggests and nothing more, a shelf that held a TV box, a router, a game console, and a tangle of cables, all in slightly different shades of black plastic. It worked perfectly well. It also looked like the single most obviously "unstyled" piece of furniture in an otherwise considered room, a fact I'd genuinely stopped noticing until a friend asked, half-joking, if I'd just moved in.
What actually fixed it wasn't replacing the console or the equipment on it. It was a handful of specific, targeted changes to how that equipment was arranged, concealed, and balanced against everything else in the room, the same fixes, it turns out, that designers reach for on nearly every media console they style.
A quick note before we start: a few of the stories ahead are shared as told to me directly, and a few are offered as illustrative examples to make a principle easier to picture, I've tried to be clear about which is which rather than presenting every anecdote as independently verified.
Here are eight specific fixes, why each one addresses a real problem with how media equipment naturally accumulates, and exactly how to apply them to whatever console you already own.
Table of Contents
- Break Up the "Black Box Row"
- Add One Warm, Textured Grouping
- Route and Hide Every Visible Cord
- Choose Legs or a Base With Visible Floor Space Beneath
- Balance the Console's Width to the TV Above It
- Ground the Whole Media Zone With a Rug
- Give Remotes and Accessories One Hidden Home
- Add Ambient Lighting Beside or Behind It
- The Design Logic: Why a Console Reads as Unfinished in the First Place
- A Console Styling Guide by Furniture Type
- Common Media Console Styling Mistakes
- The Full Cost Comparison
- Common Questions
Break Up the "Black Box Row"
Nearly every media console, regardless of style or price point, ends up with the same problem over time: a straight, unbroken row of black or dark gray rectangular equipment, a router, a streaming box, a game console, sitting shoulder to shoulder like a small server room rather than a piece of furniture in a living room.

Breaking up dark equipment with books, natural elements and open space makes a media console feel more like furniture than an equipment rack.
- Take inventory of every piece of equipment currently visible on the console.
- Separate equipment that genuinely needs to stay visible, for remote signal reasons, from equipment that could be relocated to a closed cabinet or shelf below.
- For equipment that must remain visible, break up the row by placing one piece slightly forward or back rather than perfectly aligned with the others.
- Insert one non-equipment object, a small stack of books, a single decorative piece, between clusters of equipment to break the uniform line.
- Group equipment toward one side of the console rather than spreading it evenly across the full width, leaving genuine open space elsewhere.
- Reduces the "server room" visual effect of a uniform equipment row
- Genuinely free, it's a rearrangement, not a purchase
- Immediately noticeable without changing a single piece of equipment
Search terms: "small decorative book stack," "console styling object," "small wood tray"
Add One Warm, Textured Grouping
A homeowner shared that her console's dark, glossy equipment felt considerably less clinical the moment she added one small grouping of warm-toned objects, a woven basket, a wood-framed photo, a single plant, to the console's opposite end, giving the eye somewhere warm to rest beside all the dark plastic and glass.
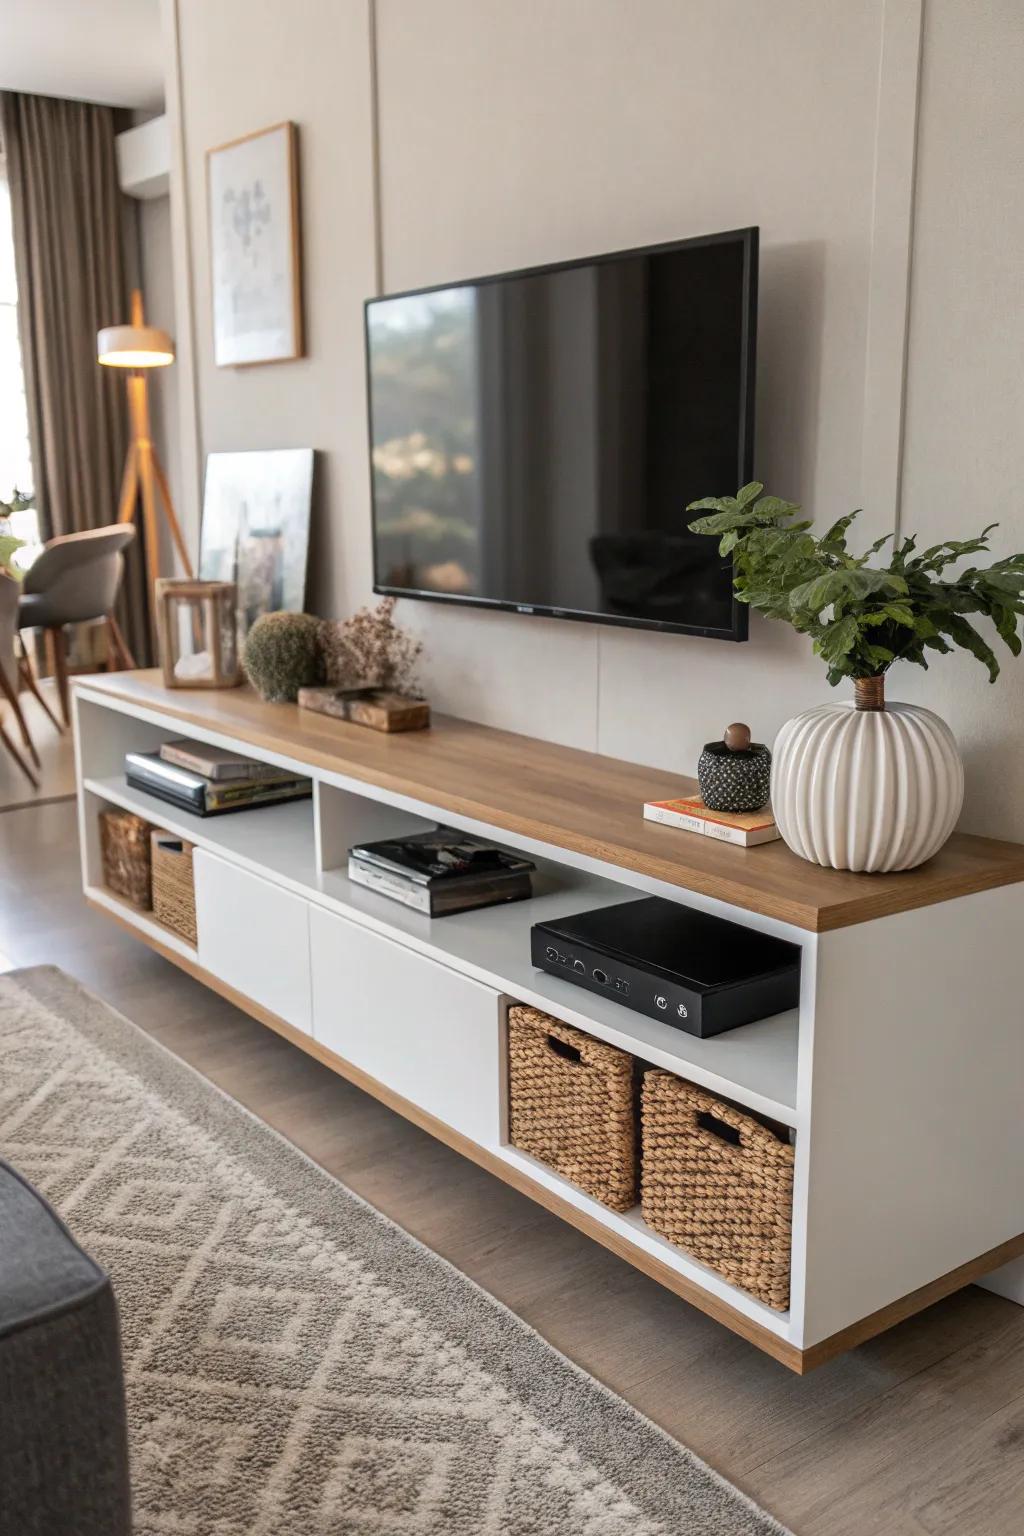
Warm wood, ceramic, woven texture and greenery soften the hard lines of a television and media equipment.
- Identify open space on the console not occupied by equipment, ideally at one end rather than centered.
- Choose two to three warm, textured objects, a woven basket, a small plant, a stack of books, following the same odd-number grouping logic that works on any surface.
- Favor matte, natural materials, wood, ceramic, woven fiber, specifically to contrast the equipment's glossy plastic and glass finishes.
- Keep the grouping genuinely small and restrained, this is a counterbalance to the equipment, not a competing display in its own right.
- Position the grouping where it's visible from the room's main seating, not tucked behind the equipment itself.
- Directly counterbalances equipment's cool, glossy visual quality
- Uses the same proven styling logic that works on coffee tables and shelves
- Achievable with items you likely already own elsewhere in your home
Search terms: "woven storage basket small," "small potted plant warm," "wood frame photo small"
Route and Hide Every Visible Cord
Imagine a reader whose console looked genuinely well-styled from a few feet away, until anyone glanced slightly lower and noticed a nest of cables spilling from the back of the equipment down to the floor and across to an outlet, undoing the polished effect the moment it was actually seen.

Clean cable routing keeps the technology functional without allowing visible wires to dominate the media wall.
- Identify every cord running from equipment to an outlet, power cords, HDMI cables, any additional device connections.
- Bundle cords running to the same general destination with a simple velcro tie or cable sleeve, reducing visual tangle.
- Route bundled cords along the back or underside of the console rather than letting them hang loosely in view from the front or sides.
- Consider a small power strip mounted to the back or underside of the console itself, keeping it off the visible floor entirely.
- Use a cord cover channel for any cable that must cross visible floor space to reach a distant outlet.
- Removes one of the most common details that undoes otherwise careful styling
- Applies universally, regardless of console style or equipment
- Genuinely low cost relative to the visual impact of fixing it
Search terms: "cable management sleeve," "cord cover channel," "under desk power strip mount"
Choose Legs or a Base With Visible Floor Space Beneath
A homeowner shared that swapping a boxy, floor-flush media cabinet for one with simple exposed legs made her entire living room feel less crowded, despite the console itself being nearly the same size, because visible floor space underneath reads as considerably lighter than a solid base sitting flush to the ground.

Exposed legs create a visible floor gap beneath the console, helping a substantial media unit feel visually lighter.
- If shopping for a new console, prioritize designs with visible, exposed legs rather than a solid base or plinth.
- If keeping your current console, check whether it can be elevated slightly with simple furniture risers, adding visible floor gap without replacing the piece entirely.
- Choose leg material and finish that complements other metal or wood tones already in the room.
- Confirm any elevation change doesn't affect the TV's mounted or placed height relative to seated eye level.
- Keep the newly visible floor space beneath genuinely clear, this fix loses its effect if that gap simply becomes a new storage zone.
- Reduces the console's visual weight without reducing its actual storage capacity
- Makes the whole media wall feel lighter and less dominant
- Achievable via risers without replacing an otherwise good console
Search terms: "furniture risers set," "media console exposed legs," "TV stand with legs"
Balance the Console's Width to the TV Above It
Imagine a reader whose narrow, small console sat beneath a genuinely large TV, leaving several inches of wall visible on either side where the screen simply hung past the furniture beneath it, an imbalance that read as accidental rather than intentional, regardless of how well the console itself was styled.
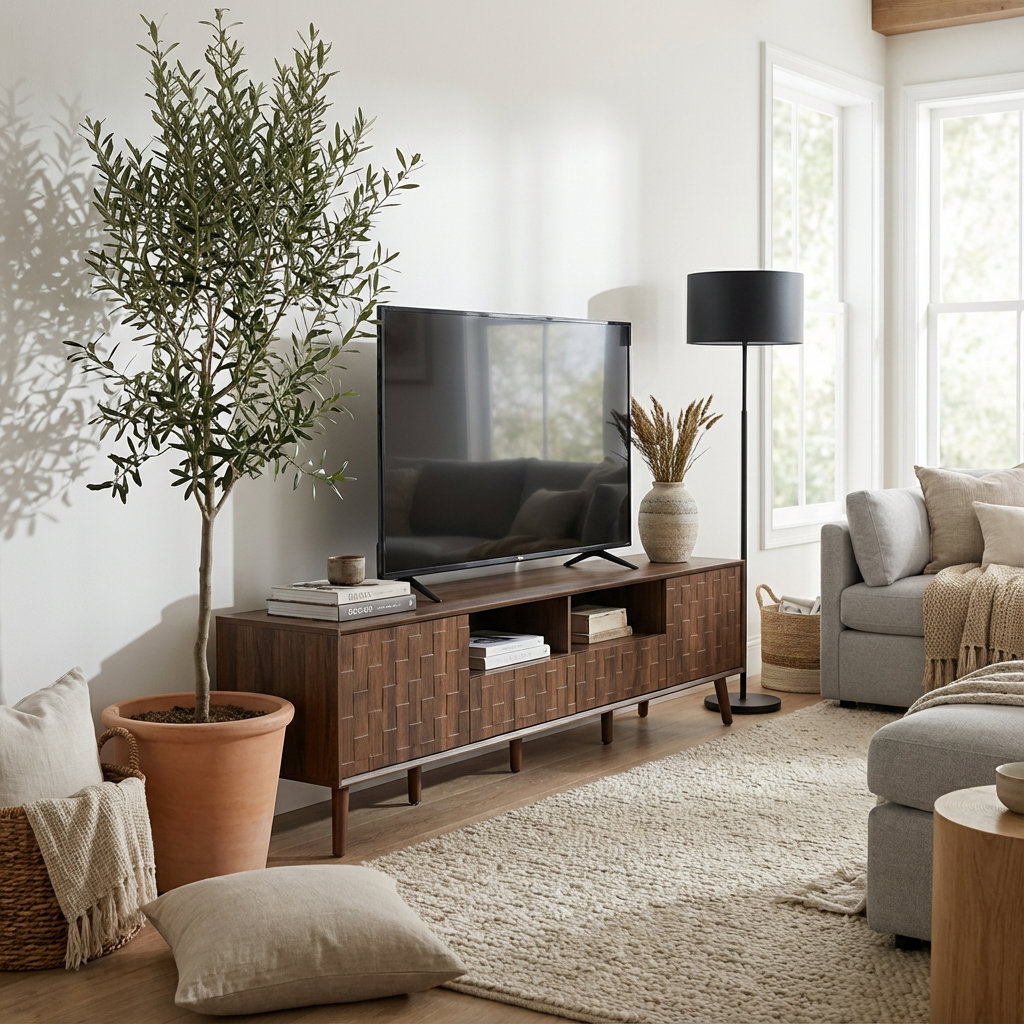
A long console gives a large television a stronger visual base and creates a more balanced horizontal composition.
- Measure your TV's total width, including the bezel, at its widest point.
- Measure your current or prospective console's total width for comparison.
- Aim for the console to be roughly equal to or slightly wider than the TV, a console noticeably narrower than the screen above it is the most common mismatch.
- If replacing the console isn't feasible, flanking elements like the shelving from a previous section of this list can visually extend the console's apparent width.
- Reassess the full wall's proportions once any width adjustment is made, viewing from the room's main seating position specifically.
- Corrects a proportion mismatch that undermines styling regardless of other efforts
- Creates a cohesive, intentional-looking media wall composition
- A one-time measurement check that costs nothing to assess
Search terms: "wide media console," "TV stand 65 inch," "media console width guide"
Ground the Whole Media Zone With a Rug
A homeowner shared that her media wall always felt slightly disconnected from the rest of her living room's seating area, two zones that never quite read as one cohesive space, until she extended her area rug to reach beneath the console itself, visually tying the whole room together.

A large area rug helps visually connect the seating area to the media wall and gives the room a more unified foundation.
- Measure the distance from your main seating area to the media console wall.
- If your current rug doesn't reach that far, consider sizing up on your next rug purchase to span the full distance.
- Position the rug so at least the front edge of the console sits on it, similar to how seating furniture legs should rest on a properly sized rug.
- Choose a rug material and pile height that won't interfere with any console doors or drawers that open at floor level.
- Reassess the whole room's proportions once the rug is extended, this single change often makes a room feel noticeably more grounded and complete.
- Unifies the media console with the rest of the room's seating composition
- Uses the same rug-sizing logic that works throughout a living room
- Makes the whole space read as one considered room, not two zones
Search terms: "large area rug living room," "low pile area rug," "rug pad non slip"
Give Remotes and Accessories One Hidden Home
Imagine a reader whose console surface stayed genuinely well-styled except for three mismatched remote controls, a game controller, and a stray phone charger, scattered wherever they'd last been used. A single drawer, or a closed-lid basket if the console lacked drawers, gave all of it one consistent, hidden home.
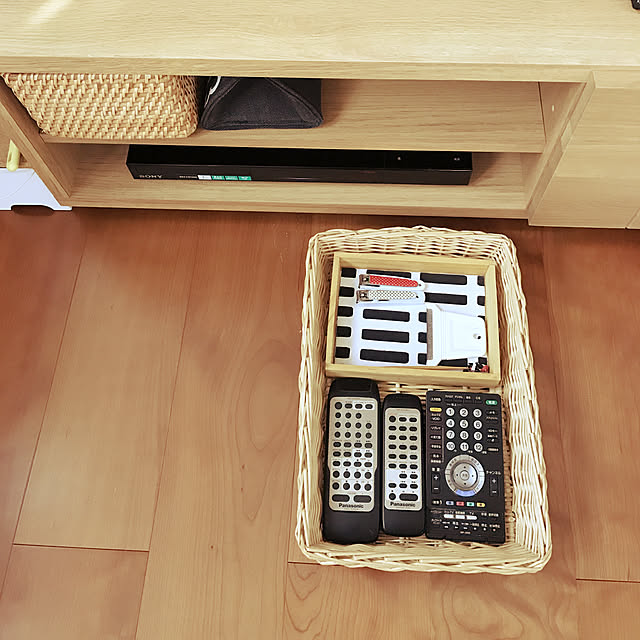
A dedicated basket gives remotes and small media accessories one consistent home instead of leaving them scattered across the console.
- Gather every remote, controller, and small media accessory currently scattered across the console or nearby.
- If your console has a drawer, designate it specifically for these items, keeping it consistent rather than a catch-all for everything.
- If no drawer exists, choose a small closed-lid basket or box that fits the console's style, placed in one consistent spot.
- Return every remote and accessory to this single home immediately after use, rather than leaving it wherever it was last picked up.
- Consider labeling multiple remotes inside the drawer or basket if a household regularly struggles to find the right one quickly.
- Removes a genuinely common, persistent clutter category entirely from view
- Makes items easier to find consistently, not harder
- Achievable with a console feature you may already have or a very small purchase
Search terms: "lidded storage basket small," "remote control organizer," "small drawer organizer tray"
Add Ambient Lighting Beside or Behind It
A homeowner shared that her media wall felt flat and purely functional in the evening, lit only by whatever light the TV itself produced, until she added a small warm lamp on the console's styled end and a slim LED strip behind the TV itself, both together transforming the whole zone into something that felt genuinely designed, not just functional.
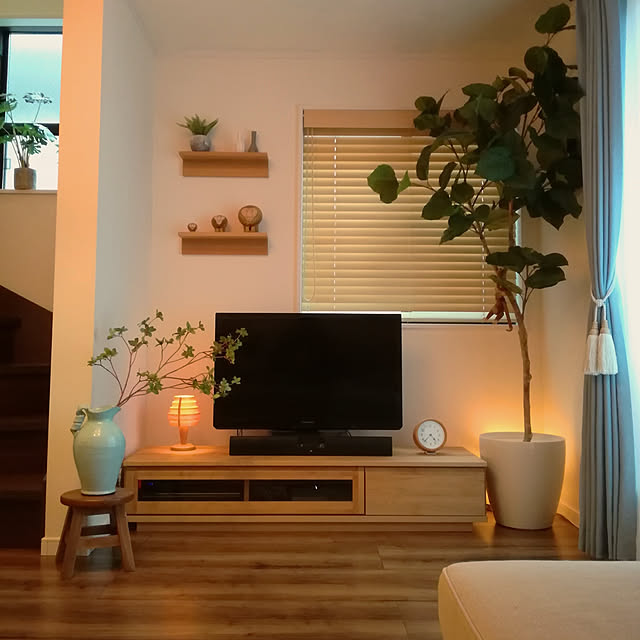
Warm ambient lighting turns a functional TV area into a softer, more inviting evening space.
- Add one small warm-toned lamp to the console's styled end from Fix 2, using a 2700K to 3000K bulb consistent with the rest of your home's lighting.
- Consider a slim, adhesive-backed LED bias-lighting strip mounted behind the TV itself, this reduces eye strain during viewing and adds a soft glow when the room is otherwise dark.
- Choose bias lighting in a warm white tone rather than a colored or RGB option for a more genuinely sophisticated, less novelty effect.
- Position the console lamp so it doesn't create glare directly on the TV screen from the main seating position.
- Test the full lighting setup in the evening specifically, since this is when the effect matters most and daytime testing won't reveal the actual impact.
- Completes the media zone's warmth in evening hours, not just daytime
- Genuinely reduces eye strain, a functional benefit alongside the visual one
- Applies the same layered-lighting principle used throughout a well-designed home
Search terms: "warm white LED bias lighting strip," "small warm table lamp," "console accent lamp"
The Design Logic: Why a Console Reads as Unfinished in the First Place

A finished media wall combines proportion, storage, natural texture, greenery and layered lighting rather than treating the console as a place for electronics alone.
A media console occupies a uniquely difficult design position compared to nearly any other piece of living room furniture: it's the one surface in the room whose contents, cable boxes, routers, gaming systems, are chosen entirely for function and updated on a completely different timeline than the rest of the room's decor. A coffee table or shelf gets styled once and largely stays that way; a media console accumulates new equipment periodically, often in whatever color and finish the manufacturer chose, with zero consideration for how it will look sitting beside everything else in your home. This is precisely why the same styling instincts that work everywhere else, grouping, restraint, warm textures, layered lighting, need to be applied here quite deliberately rather than assumed to happen naturally, nobody accidentally style-coordinates a router. Every fix on this list works by either directly addressing the equipment's inherent visual coldness, texture, lighting, cord concealment, or by adjusting the furniture and proportions around it, legs, width matching, rug grounding, so the whole composition reads as considered despite housing objects that were never designed with your living room in mind.
A Console Styling Guide by Furniture Type
- Open shelf console, no doors: prioritize breaking up the equipment row (Fix 1) and cord concealment (Fix 3) first, since everything is fully visible at all times.
- Console with closed cabinet doors: relocate as much equipment as possible behind the doors, then focus remaining effort on the visible top surface styling (Fix 2) and lighting (Fix 8).
- Floating wall-mounted console: the exposed-floor benefit of Fix 4 is already built in; focus instead on width matching (Fix 5) and cord concealment, which matters even more with a floating design since nothing hides cords below.
- Vintage or secondhand console: often already features exposed legs and warm wood tones naturally; prioritize equipment row styling (Fix 1) and remote storage (Fix 7) to modernize the functional side without losing the piece's existing character.
Common Media Console Styling Mistakes
- Styling only the top surface while ignoring cords: undermines the effect the moment anyone looks slightly lower.
- Choosing console width based on storage needs alone: without checking proportion against the TV above it.
- Treating equipment arrangement as fixed: when simple rearrangement, no purchase required, often makes a meaningful difference.
- Overlooking evening lighting entirely: a media wall that looks fine in daylight can feel flat and purely functional after dark.
- Letting remotes and accessories scatter without one consistent home: a small, recurring clutter source that compounds over time.
The Full Cost Comparison
| Fix | Typical Cost |
|---|---|
| Breaking up the equipment row | $0 |
| Warm textured styling grouping | $15–45 |
| Cord concealment | $10–40 |
| Furniture risers for exposed legs | $15–35 |
| Width-matched console (if replacing) | Varies, often similar to current console cost |
| Rug extension or upsize | $40–120 |
| Remote and accessory storage | $8–25 |
| Ambient lighting (lamp + bias strip) | $25–55 |
| Typical total across most fixes | Usually under $150, several fixes entirely free |
Common Questions
Which single fix delivers the most noticeable change for the least cost? Breaking up the equipment row is completely free and often the single most immediately noticeable change, since it directly addresses the "server room" effect most consoles develop over time.
Can I apply these fixes to a console I'm not planning to replace anytime soon? Yes, nearly every fix on this list, aside from a full width-matched replacement, works on any existing console regardless of age or style.
Does this approach work for a console in a bedroom, not just a living room? The same principles apply equally well, though bedroom consoles often hold less equipment overall, meaning fixes 1 and 3 may matter less while the styling and lighting fixes (2 and 8) often matter more.
How often should I revisit the console's styling once it's set up? New equipment tends to arrive periodically, a streaming device upgrade, a new gaming system, revisit the arrangement whenever something new joins the setup rather than waiting for it to accumulate into a new version of the original problem.
Is it worth hiring help for cord concealment specifically? For a basic cable management setup, most people can do this themselves with the products listed; an in-wall cord routing kit involving electrical work is the one exception worth professional consultation.
A media console was never actually destined to look like an equipment rack simply because that's what it holds. Every fix here proves the same point: the objects on top of it were never designed with your room in mind, but the furniture, the arrangement, and the space around them entirely are, and that's where the real design decision actually lives.
Start with the free one tonight, rearrange the equipment row and break up that straight black line, and notice how much of the "unfinished" feeling was really just a lack of intentional arrangement all along.
Shop the Story
- woven storage basket small
- cable management sleeve
- furniture risers set
- wide media console
- large area rug living room
- lidded storage basket small
- warm white LED bias lighting strip
- small warm table lamp
- cord cover channel
- remote control organizer