10 Storage Tricks That Make Small Closets Feel Twice the Size
Double usable closet space with zero renovation
My first apartment closet was, by measuring tape, thirty-six inches wide. For the first year I lived with it exactly as it came, one rod, one shelf, and roughly a foot of dead air between the bottom of my shirts and the floor that I never once thought to use. I assumed the closet's size was simply a fact about the apartment, something to work around rather than something I could actually change.
What changed my mind was realizing that almost none of the "small closet" problem was actually about square footage. It was about how much of the space that already existed, the air above the rod, the inside of the door, the walls on either side, was being counted as unusable simply because nobody had ever put anything there.
A quick note before we start: a few of the stories ahead are shared as told to me directly, and a few are offered as illustrative examples to make a principle easier to picture, I've tried to be clear about which is which rather than presenting every anecdote as independently verified. A practical note on scope: these ten are genuinely zero-renovation, no drilling required for any of them, though a few benefit from an adhesive hook or tension rod that needs a day to fully cure before you load it up.
Here are the ten changes that actually doubled how much my closet could hold, why each one works even in a genuinely small space, and how to adapt them if you're sharing a closet or working with a single rod in a studio apartment.
Table of Contents
- Add a Second Hanging Rod
- Switch to Slim, Matching Hangers
- Claim the Space Above Your Existing Rod
- Turn the Inside of the Door Into Storage
- Vacuum-Seal Your Off-Season Items
- Stack With Risers Instead of Piling Bins
- Use the Side Walls, Not Just the Back
- Add a Valet Rod for Outfit Staging
- Store Under Your Hanging Clothes, Not Just Beside Them
- Zone and Label Everything So It Stays That Way
- Why a Tidy Closet Makes the Whole Room Feel Bigger
- Adapting These Tricks for a Shared Closet or Studio
- Common Small Closet Mistakes
- Which Tricks to Do First If You Only Have an Afternoon
- The Cost of Doubling Your Closet Space
- Common Questions
Add a Second Hanging Rod
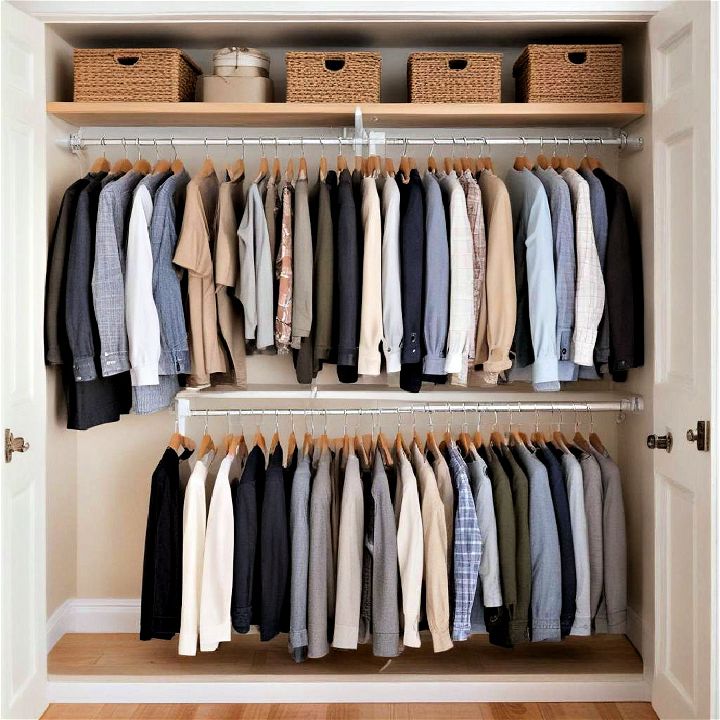
Most closet rods are hung to accommodate the longest items in the house, coats and dresses, which leaves a wide gap of completely empty air under every folded shirt, cropped jacket, and pair of pants on a clip hanger. A renter I spoke with realized she was only using the top half of her closet's actual height and added a second rod below her shirt section using a simple tension rod, no drilling, no landlord approval needed.
- Measure from the bottom of your shortest hung items (usually folded shirts on clip hangers) down to the floor.
- Confirm there's at least 30–34 inches of clearance, enough for a second rod plus hanging shirts or folded pants beneath it.
- Choose a tension rod sized to your closet's interior width, or a permanent closet rod and bracket kit if you own the space.
- Install the rod roughly two-thirds of the way down the existing gap, leaving room for shorter garments to hang without touching the floor.
- Move shirts, folded slacks, and skirts to the new lower rod, keeping only coats, dresses, and other long items on the original one.
- Roughly doubles usable hanging space in the exact same footprint
- Uses vertical space that was already there, just empty
- Fully removable in a rental with a tension rod option
Search terms: "adjustable closet tension rod," "double hang closet rod kit," "no drill closet rod"
Switch to Slim, Matching Hangers

A closet with forty mismatched wire, wood, and thick plastic hangers can use several inches more rod width than the exact same forty garments on slim, uniform hangers. It doesn't look like much per hanger, but multiplied across an entire rod, it's often the difference between a closet that feels stuffed and one that feels genuinely spacious.
- Pick one slim hanger style, velvet-flocked is the most common choice since it also grips fabric well.
- Start with your most-used section rather than the whole closet at once, so the payoff is immediate.
- Transfer each garment one at a time rather than dumping clothes in a pile, this naturally becomes a quick declutter too.
- Donate or recycle the mismatched hangers you remove rather than storing them elsewhere in the home.
- Keep specialty hangers, like clip hangers for skirts or pants, in the same matching finish for visual consistency.
- Frees real, measurable rod space without removing a single garment
- Makes the whole closet look considerably more cohesive at a glance
- Reduces clothes slipping off hangers onto the closet floor
Search terms: "slim velvet hangers set," "matching closet hangers bulk," "space saving hangers"
Claim the Space Above Your Existing Rod

The gap between the top of a closet rod and the ceiling is one of the most consistently wasted spaces in a small home, and also one of the easiest to reclaim, since nothing stored there needs to be reached daily. A single adjustable shelf, or even a few stacked labeled bins, can absorb an entire season's worth of clothing that would otherwise be competing for space on the main rod.
- Measure the vertical gap between the top of your rod and the closet ceiling.
- Choose a tension-mounted shelf if there's enough clearance, or stackable bins if the gap is shallower.
- Reserve this zone specifically for infrequently used or seasonal items, not anything you reach for weekly.
- Label the front of each bin clearly so you're not pulling several down just to find the right one.
- Leave a small step stool nearby if this zone is genuinely out of reach without one, rather than skipping it entirely.
- Reclaims space that was already there and already empty
- Gives seasonal or rarely used items a genuine home off the main rod
- Keeps daily-use items uncrowded on the rod below
Search terms: "tension mount closet shelf," "stackable canvas storage bins," "labeled closet storage bins"
Turn the Inside of the Door Into Storage
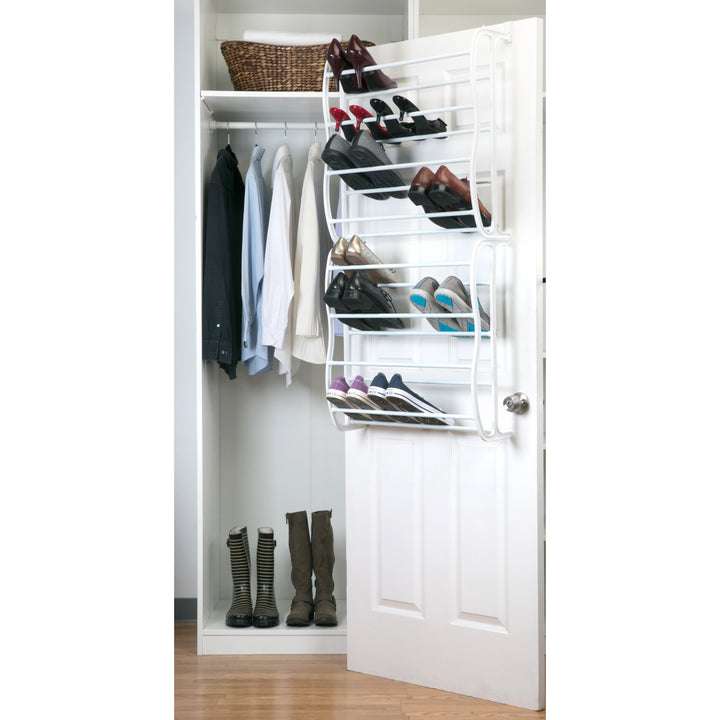
The inside of a closet door is one of the largest flat surfaces in the entire space, and in most homes it sits completely unused while shoes and accessories pile up on the floor instead. An over-the-door organizer, hung with no tools required, can absorb an entire category of clutter in the same afternoon it takes to unbox it.
- Measure the inside dimensions of your closet door before choosing an organizer.
- Pick one suited to what actually needs a home, shoes, accessories, cleaning supplies, or scarves.
- Hang it using its built-in over-the-door hooks, which require no drilling on a standard hinged door.
- Test that the door still closes fully once it's loaded, before committing to it as a permanent solution.
- Assign one clear category per organizer rather than letting it become a second junk drawer on the door.
- Uses one of the largest unused surfaces in the closet
- Clears an entire category of floor clutter in one step
- Requires no drilling on a standard hinged door
Search terms: "over the door shoe organizer," "over the door hook organizer," "adhesive door hooks"
Vacuum-Seal Your Off-Season Items
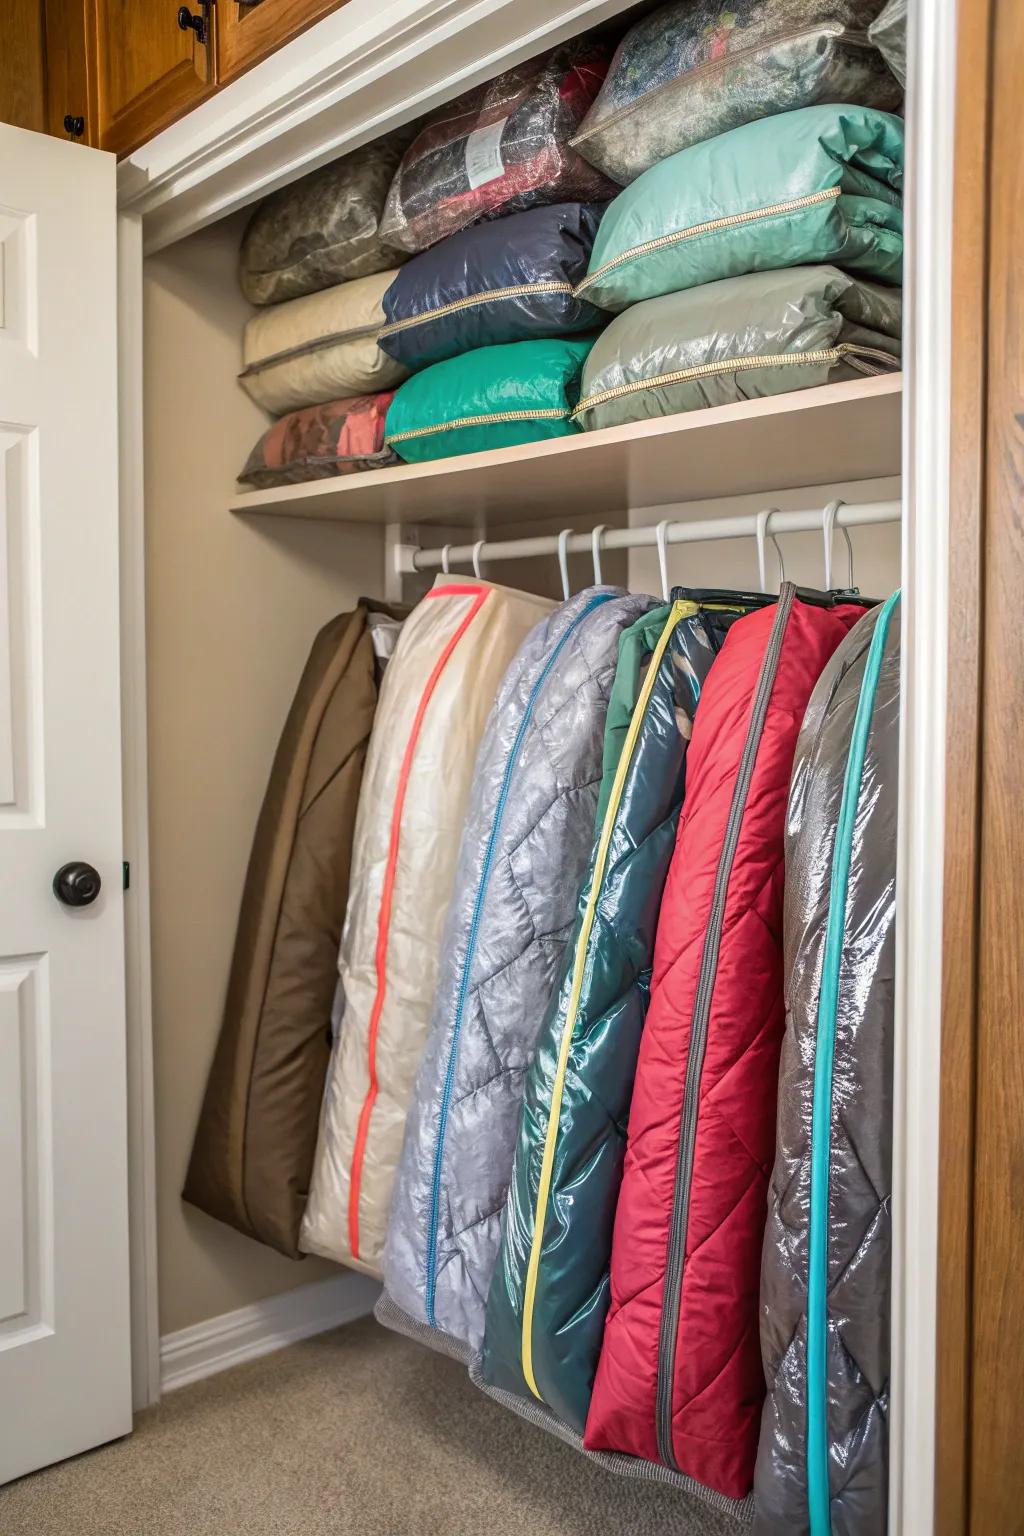
Bulky winter coats and sweaters hang on the exact same rod, taking up the exact same space, whether it's January or July, even though half the year they're never touched. Vacuum storage bags compress those items down to a fraction of their original size and move them entirely out of daily rod competition.
- Sort out items that are genuinely out of season, not just "might wear it this week."
- Fold each item flat before placing it inside a vacuum storage bag.
- Remove the air using a vacuum or the bag's built-in hand pump, following the bag's instructions.
- Store sealed bags on the shelf above the rod (from Idea 3) or in the under-hanging zone (Idea 9).
- Label each bag by season and general contents so you're not opening several just to check what's inside.
- Frees a significant portion of rod space for the current season only
- Protects off-season clothing from dust while it's stored away
- Makes seasonal swaps quick since everything is already sorted and labeled
Search terms: "vacuum storage bags variety pack," "seasonal clothing storage bags," "underbed storage bag"
Stack With Risers Instead of Piling Bins

A single shelf with a tall, unstructured stack of folded sweaters means reaching the bottom item requires unstacking everything above it, which is exactly why that shelf slowly turns into a pile instead of a system. A slim wire riser or a set of stackable shelf inserts splits that same shelf into two genuinely accessible tiers.
- Measure the vertical clearance on each shelf before choosing a riser.
- Add a stackable riser shelf or wire insert to divide one tall shelf into two shorter, independently accessible tiers.
- Sort by category per tier, sweaters on one side, folded tees on the other, rather than one undivided pile.
- Keep whatever you reach for most at the eye-level tier, not the very top.
- Reassess every few months, since what you reach for most tends to shift with the season.
- Turns one crowded shelf into two genuinely usable ones
- Removes the need to unstack a pile to reach what's underneath
- Makes it obvious at a glance when a tier is getting overfull
Search terms: "stackable shelf riser closet," "wire shelf organizer insert," "closet shelf divider"
Use the Side Walls, Not Just the Back
Most closet storage planning focuses entirely on the back wall, where the rod usually lives, and the floor, while the two side walls sit completely bare. A handful of slim adhesive hooks on either side can absorb bags, scarves, belts, and umbrellas without touching the main hanging space at all.
- Measure the depth of each side wall relative to the door swing.
- Add slim adhesive hooks or a narrow wall-mounted organizer, keeping everything thin enough not to block the door.
- Use one side for items you grab daily, like tomorrow's bag or an umbrella, and the other for less frequent accessories.
- Let adhesive fully cure, usually about 24 hours, before hanging anything on new hooks.
- Check the hook's weight rating before hanging anything heavier than a light tote or scarf.
- Uses wall space that's genuinely unused in almost every closet
- Keeps grab-and-go items off the floor and off the main rod
- Requires no drilling and is fully removable in a rental
Search terms: "adhesive wall hooks heavy duty," "slim wall mounted organizer," "closet side wall storage"
Add a Valet Rod for Outfit Staging
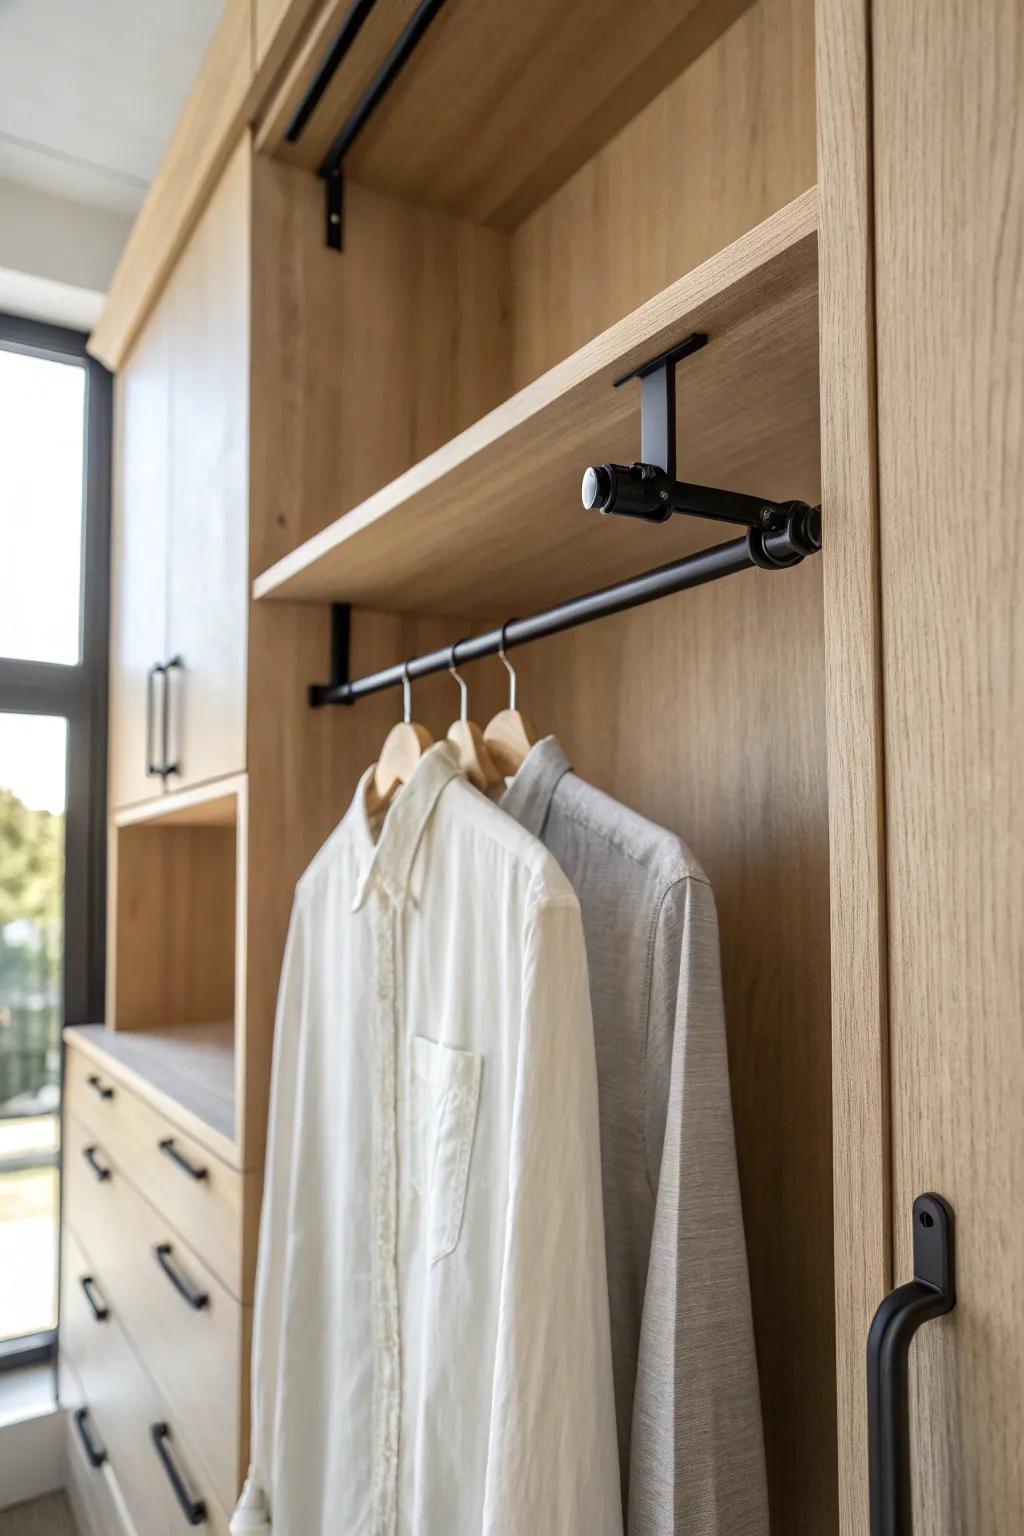
A recurring source of morning chaos in a small closet isn't usually the storage system itself, it's the outfit that gets half-pulled together the night before, draped over a chair or a door handle because there was never a real spot for it. A small pull-out valet rod gives that in-progress outfit exactly one dedicated place to live.
- Choose a small pull-out or fixed valet rod sized to hold one outfit at a time, not a whole week's worth.
- Mount it to the side wall or underneath a shelf, using adhesive mounting if you'd rather avoid drilling.
- Use it exclusively for tomorrow's outfit, resist the temptation to let it become overflow storage.
- Return anything not worn back to its actual spot the same day, rather than letting it linger on the rod.
- Keep it empty by default, an empty valet rod is doing its job; a permanently full one has quietly become clutter.
- Solves the specific chaos of "getting ready" clutter, not general storage
- Keeps the rest of the closet system from being disrupted daily
- Small enough to fit in even the tightest closets
Search terms: "pull out valet rod closet," "closet valet hook," "single garment hanger rod"
Store Under Your Hanging Clothes, Not Just Beside Them
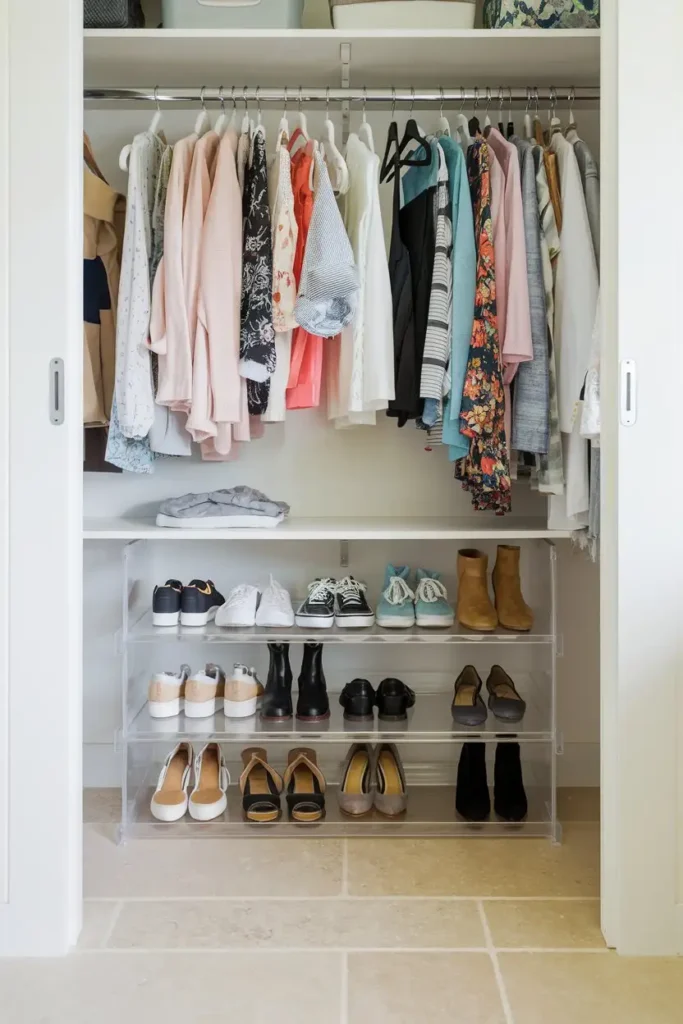
The floor space directly beneath longer hanging items, dresses, robes, and coats, tends to sit completely empty in most closets, since it looks awkward to use and is partially obstructed by the hems above it. A slim shoe rack or a set of stackable drawers tucked into exactly that gap reclaims floor space most closets never touch.
- Measure the clearance between the floor and the hem of your longest hanging garments.
- Choose a slim shoe rack, stackable drawer unit, or low basket sized to fit within that clearance.
- Slide it directly beneath the longest items, where it's least likely to be disturbed by everyday hanging and rehanging.
- Reserve this zone for things you don't need to see or reach daily, like off-season shoes or spare linens.
- Choose a front-loading or slide-out design so reaching it doesn't require moving the hanging clothes above it.
- Reclaims floor space that's usually written off as unusable
- Keeps rarely used items out of sight without leaving the closet
- Works in both reach-in and walk-in layouts with minor adjustments
Search terms: "slim under closet shoe rack," "stackable closet floor drawers," "low profile storage basket"
Zone and Label Everything So It Stays That Way
The first nine tricks on this list can genuinely double a closet's usable space, and within a few weeks it can still drift right back to where it started if there was never an actual rule for where new items go. Zoning and labeling is the difference between organizing a closet once and it actually staying that way.
- Assign each zone created by the previous nine tricks a specific category, rod one for shirts, rod two for pants, the shelf for folded knits, the door for shoes.
- Label each zone clearly, a simple tag or a label maker works, so there's no ambiguity about where something belongs.
- Do a five-minute reset once a week where anything found outside its zone gets returned to its actual spot.
- Revisit the zones every season, since what you reach for most tends to shift with the weather and your routine.
- Resist adding a new item to the closet without deciding its zone first, this single habit prevents most future drift.
- Turns a one-time organizing project into a system that actually holds
- Makes maintenance take minutes instead of a full afternoon each time
- Makes it obvious the moment something is drifting out of its zone
Search terms: "closet label maker," "fabric bin labels," "closet zone dividers"
Why a Tidy Closet Makes the Whole Room Feel Bigger
It's worth understanding why a closet you can't even see behind a closed door still affects how big the rest of the room feels. Most visible clutter in a bedroom or entryway, clothes on a chair, shoes by the door, a bag with nowhere to go, actually originates from a closet that ran out of usable space and started overflowing into the room around it. Reclaiming the space above the rod, behind the door, and along the side walls doesn't just make the closet hold more, it removes the pressure that pushes items out into the visible parts of the room in the first place. A closet with real capacity keeps its contents contained, which is a large part of why organizing one small space can make an entire room feel noticeably more spacious without moving a single piece of furniture.
Adapting These Tricks for a Shared Closet or Studio
If you're sharing one closet with a partner, roommate, or in a studio apartment with no separate bedroom, most of these ten tricks still apply, just divided rather than doubled. The second rod (Idea 1) can be assigned entirely to one person rather than split by garment length, giving each person a clearly defined section. The door organizer (Idea 4) and side wall hooks (Idea 7) work well as a per-person zone, one person's accessories on the door, the other's on the wall, so nothing gets mixed up without a label. The valet rod (Idea 8) is especially useful in a studio specifically, since it gives a designated staging spot for tomorrow's outfit without needing a separate room to lay it out in. Zoning and labeling (Idea 10) matters even more here, since a shared space without clear ownership per zone tends to drift back to clutter faster than a single-person closet does.
Common Small Closet Mistakes
- Buying storage products before decluttering first: adding bins and organizers to a closet still full of things you don't actually wear just organizes the clutter instead of removing it.
- Mixing hanger types after switching: a few leftover bulky hangers mixed in with slim ones quietly undoes most of the space gained from Idea 2.
- Overloading the above-rod or door storage: packing rarely used zones so full that reaching daily items now requires a step stool defeats the purpose.
- Skipping the labeling step entirely: a system with no labels tends to revert to a single junk pile within a few weeks, especially in a shared closet.
- Storing daily-use items at the very top: reserve the above-rod space specifically for seasonal or rarely used items, not things you reach for often.
Which Tricks to Do First If You Only Have an Afternoon
- 1. Switch to slim, matching hangers — the fastest, highest-impact visual change, and often frees space without moving anything else.
- 2. Add a second hanging rod — doubles usable rod space in the same afternoon with a simple tension rod.
- 3. Set up the door organizer — clears an entire category of floor clutter in under an hour.
- 4. Zone and label what you have so far — locks in the progress from the first three steps so it actually holds.
- 5. Store under your hanging clothes — reclaims one more meaningful chunk of floor space if time remains.
The remaining five tricks, the above-rod space, vacuum sealing, shelf risers, side wall hooks, and the valet rod, compound well on top of these five but matter somewhat less if your first goal is simply making the closet function well by dinner time.
The Cost of Doubling Your Closet Space
| Trick | Typical Cost |
|---|---|
| Tension rod for double hanging | $10–25 |
| Slim matching hangers (30–40 pack) | $15–35 |
| Above-rod shelf or stackable bins | $15–40 |
| Over-the-door organizer | $15–30 |
| Vacuum storage bags (variety pack) | $10–20 |
| Shelf risers or wire inserts | $8–20 |
| Adhesive side wall hooks | $6–15 |
| Valet rod or hook | $8–20 |
| Under-hanging shoe rack or drawers | $15–35 |
| Label maker | $15–30 |
| Doing all ten realistically | Around $120–170 total |
Common Questions
Do I need to do all ten to see a real difference? No, the second rod, slim hangers, and the door organizer alone typically account for most of the felt change in usable space.
Will any of this damage a rental closet? Every trick here is designed to avoid drilling, tension rods, adhesive hooks, and stackable bins all remove cleanly when you move.
What if my closet is genuinely tiny, smaller than average? Prioritize the door and side walls first, since those add space without touching the floor or rod at all, then add the second rod once you've confirmed the clearance works.
How often should I redo the zoning and labeling? A light seasonal check, about four times a year, is usually enough to catch drift before it turns back into clutter.
A closet that feels twice the size was never actually about a bigger space or a full renovation. Every trick here proves the same point: the space was mostly already there, waiting in the gaps nobody had thought to use yet.
Start with the free one tonight, swap in slim hangers for just one section, and notice how much more room the exact same closet suddenly has.
Shop the Story
- adjustable closet tension rod
- slim velvet hangers set
- tension mount closet shelf
- over the door shoe organizer
- vacuum storage bags variety pack
- stackable shelf riser closet
- adhesive wall hooks heavy duty
- pull out valet rod closet
- slim under closet shoe rack
- closet label maker