9 Accent Wall Ideas That Don't Require Paint or Nails
Statement walls with zero commitment, fully renter-friendly and completely reversible
I stood in my first rental apartment staring at a completely bare wall for almost four months. I had ideas, plenty of them, but every single one started with "paint it" or "hang something," and my lease agreement was very specific about both. A $200 deposit was riding on that wall staying exactly the color it was the day I moved in.
I remember calling my landlord just to ask, carefully, whether a single nail hole would actually be a problem. She laughed and said, "Depends how many holes you're planning on." That conversation was enough to convince me I needed a completely different approach, one where the question of damage never came up at all.
What I found, once I actually looked, was that some of the most striking accent walls I'd ever seen in other rentals used no paint and no nails whatsoever. A quick note before we start: a few of the renter stories ahead are shared as told to me directly, and a few are offered as illustrative examples to make a principle easier to picture, I've tried to be clear about which is which.
Here are nine ways to build a genuine statement wall in a rental, all fully reversible, all deposit-safe, starting with the one that surprised me the most.
Table of Contents
- Peel-and-Stick Wallpaper
- Tension Rod Fabric or Tapestry
- Command Strip Gallery Wall
- Washi Tape Geometric Design
- Leaning Oversized Mirror or Art
- Removable Vinyl Wall Decals
- Macrame or Woven Wall Hanging
- Adhesive Wood Panel Accent
- Fabric Backdrop Curtain Wall
- A Renter's Damage-Free Toolkit
- How to Remove Everything Without a Trace
- The Full Cost Comparison
- Common Questions
Peel-and-Stick Wallpaper

My first real accent wall wasn't paint at all, it was a roll of peel-and-stick wallpaper I applied over a single weekend, fully expecting to regret it by Tuesday. Instead, it stayed up for the full two years of that lease and came down cleanly the day I moved out, leaving nothing behind but a slightly cleaner patch of wall than the rest of the room.
- Clean and fully dry the wall surface before applying anything.
- Test a small, inconspicuous section first and let it sit 48 hours before committing to the full wall.
- Apply from the top down in sections, using a smoothing tool to push out air bubbles as you go.
- Trim excess at the edges with a sharp utility knife for a clean line.
- To remove, peel slowly from a bottom corner at a low angle, rather than pulling straight outward.
- Covers an entire wall in pattern, texture, or color in an afternoon
- Fully removable, no residue on properly prepared walls
- Far more dramatic visual impact than paint for a similar cost
Search terms: "removable peel and stick wallpaper," "temporary wallpaper roll," "wallpaper smoothing tool"
Tension Rod Fabric or Tapestry
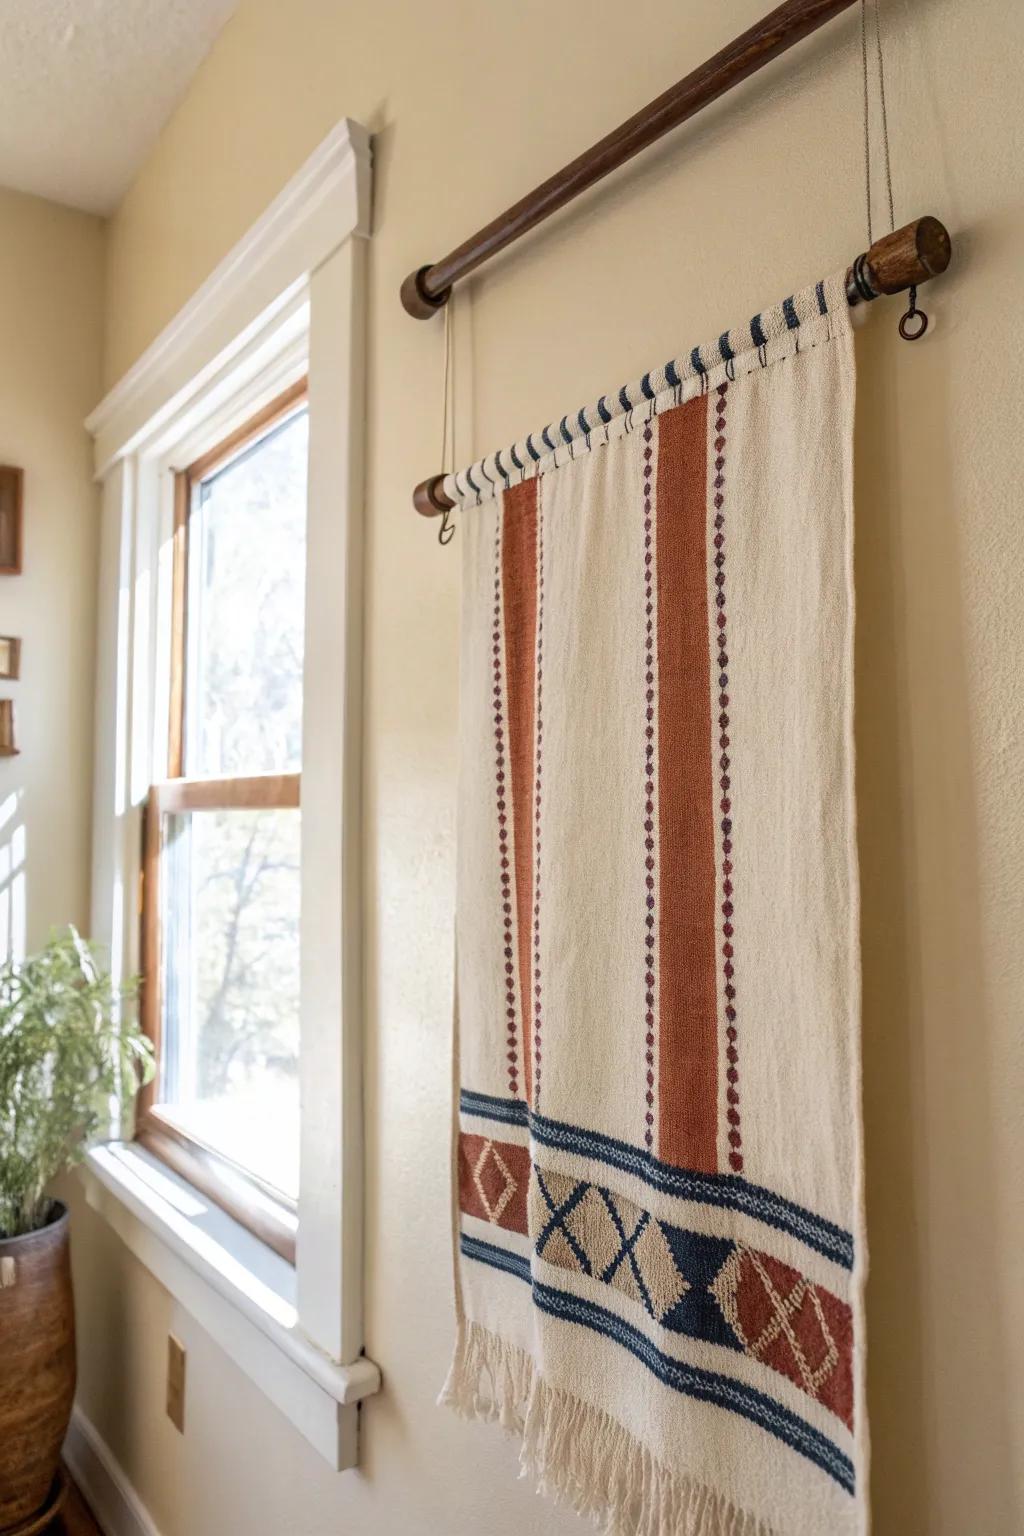
A friend of mine turned an entire blank wall into a rich, textured focal point using nothing but a tension rod and a large piece of patterned fabric, no tools, no hardware store trip, no landlord conversation required at all.
- Measure the width of the wall or corner space where the rod will sit.
- Choose a tension rod rated for slightly more width and weight than you think you need.
- Fold the top of your fabric or tapestry over the rod and pin or sew a simple sleeve if it doesn't already have one.
- Wedge the rod into place at your desired height, testing it holds firm before letting go fully.
- Steam or iron the fabric before hanging to remove fold lines for a more finished look.
- Zero wall contact whatsoever, completely reversible in seconds
- Adds texture and softness paint alone can't provide
- Easy to swap fabric seasonally without any new hardware
Search terms: "spring tension curtain rod," "large wall tapestry," "patterned cotton fabric by the yard"
Command Strip Gallery Wall

I used to think gallery walls were strictly for homeowners willing to commit to a dozen nail holes. Then I discovered heavy-duty picture-hanging strips designed specifically to hold real frame weight without a single nail, and rebuilt an entire gallery wall over one Saturday afternoon.
- Weigh or estimate each frame's weight and choose strips rated appropriately for that weight class.
- Lay the full arrangement out on the floor first, adjusting spacing before anything touches the wall.
- Clean the wall surface with rubbing alcohol where each strip will attach, oils and dust weaken adhesion significantly.
- Apply strips per the package instructions, typically pressing firmly for a set number of seconds.
- Wait the full recommended cure time (often an hour) before hanging the actual frame.
- Achieves a genuine gallery wall look with zero permanent damage
- Easy to rearrange or add to over time without new holes
- Removes cleanly, most brands include a stretch-release tab
Search terms: "heavy duty picture hanging strips," "removable adhesive picture hooks," "gallery wall frame set"
Washi Tape Geometric Design

Imagine a reader who wanted a bold geometric accent wall but was terrified of committing to paint in a color she might tire of within a year. She built the entire pattern using colored washi tape instead, a decision that took an afternoon and cost less than a single can of paint.
- Sketch your pattern on paper first, simple geometric shapes (triangles, chevrons, a sunburst) work best for a first attempt.
- Use a pencil to lightly mark key reference points on the wall before applying any tape.
- Apply tape in long, straight pulls rather than short overlapping pieces for cleaner lines.
- Press firmly along each edge with a credit card or similar flat tool to prevent paint bleed if combining with any painted elements.
- Remove slowly at a low angle when ready for a change, washi tape is specifically designed to release cleanly.
- Extremely low cost relative to visual impact
- Fully customizable pattern and color combinations
- Genuinely damage-free removal in nearly all cases
Search terms: "wide washi tape rolls," "geometric wall tape pattern kit," "colored masking tape for walls"
Leaning Oversized Mirror or Art

The single easiest accent wall idea I ever used required no adhesive, no hardware, and no wall preparation whatsoever. I simply leaned a large mirror against an empty wall, and it instantly became the most complimented feature in the entire apartment.
- Choose a piece genuinely large relative to the wall, undersized leaning art looks accidental rather than intentional.
- Position it slightly off-center rather than perfectly centered for a more natural, editorial feel.
- Anchor the base with a small stack of books or a low console table for both stability and styling.
- For mirrors specifically, angle it very slightly forward at the top for safety, tilted just enough to lean securely against the wall.
- Add a small rug or furniture piece nearby to visually ground the arrangement.
- Zero wall contact, zero damage risk whatsoever
- Reads as an intentional, editorial styling choice, not a shortcut
- Instantly repositioned or swapped whenever you want a change
Search terms: "large leaning floor mirror," "oversized canvas art," "large framed print"
Removable Vinyl Wall Decals

One homeowner shared that she'd always associated wall decals with children's rooms, simple shapes, cartoon characters, until she found sophisticated large-scale botanical and abstract decal designs meant specifically for adult living spaces.
- Clean the wall thoroughly and let it dry completely before application.
- Use painter's tape to mark placement guidelines for larger or multi-piece decal designs.
- Apply from one edge, smoothing outward with a plastic scraper or credit card to avoid trapped air.
- For multi-piece designs, work in the sequence recommended in the product instructions, usually center-out or top-down.
- Remove slowly at a low angle; gently warming stubborn edges with a hair dryer on low heat helps release adhesive cleanly.
- Adds pattern, shape, or texture without any paint or tools
- Wide range of sophisticated, adult-oriented designs now available
- Removes cleanly from most smooth painted surfaces
Search terms: "removable vinyl wall decal large," "botanical wall decal," "abstract wall sticker"
Macrame or Woven Wall Hanging
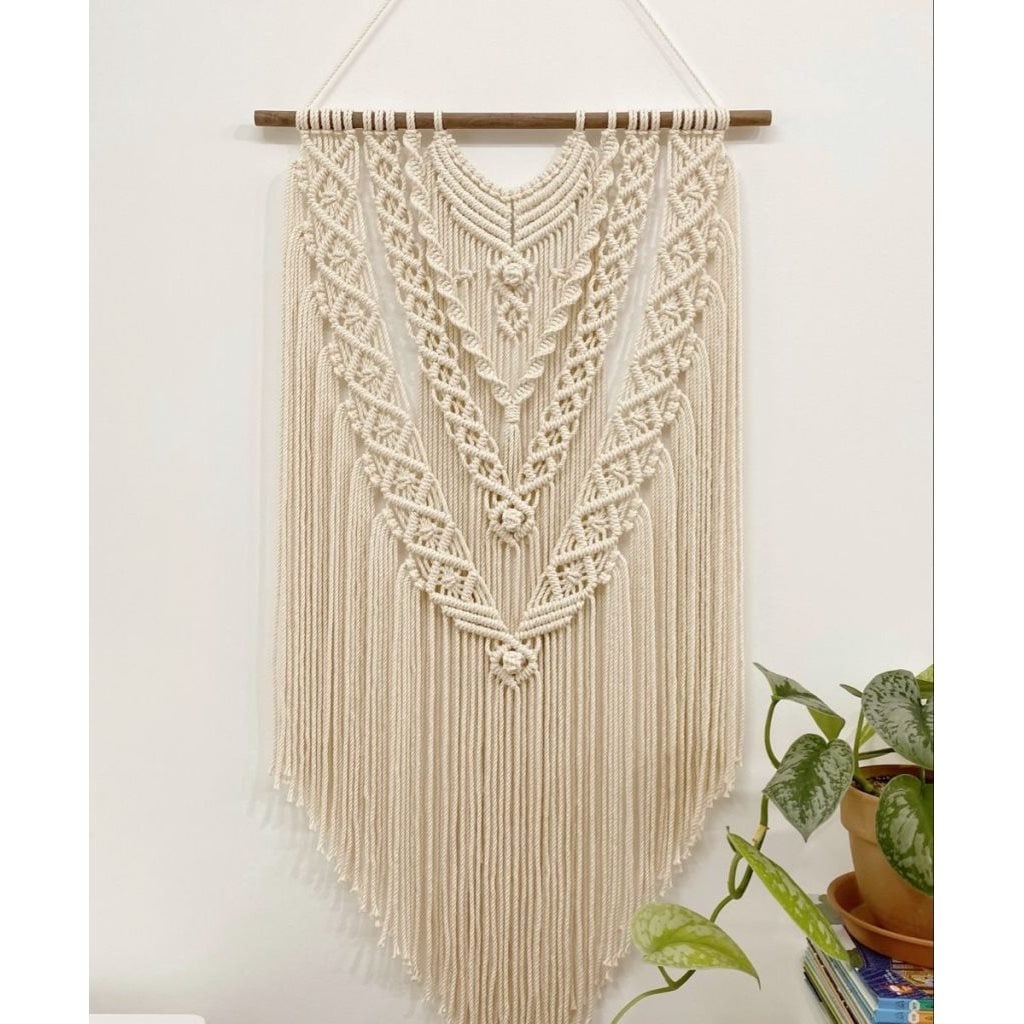
A single, well-made macrame or woven wall hanging did more for one awkward wall in my apartment than three separate framed prints had managed to do combined, and it required nothing more than one properly rated adhesive hook.
- Weigh or estimate your piece's weight, most macrame hangings are lighter than they visually appear.
- Choose an adhesive hook rated comfortably above that estimated weight.
- Clean the wall surface with rubbing alcohol before applying the hook.
- Press firmly for the manufacturer's recommended time and allow full cure time before hanging the piece.
- Center the piece at a height where the bottom fringe sits comfortably above furniture below it.
- Adds texture, dimension, and warmth in one simple piece
- Requires only a single small point of wall contact
- Effortlessly bohemian or minimalist depending on the style chosen
Search terms: "large macrame wall hanging," "woven wall tapestry boho," "heavy duty adhesive wall hook"
Adhesive Wood Panel Accent
I genuinely didn't believe a real wood accent wall was possible without nails or screws until I found thin, lightweight wood panel strips designed with a peel-and-stick adhesive backing specifically for this purpose.
- Clean and dry the wall thoroughly, adhesive wood panels need a genuinely clean surface to bond properly.
- Plan your layout and spacing on paper first, particularly for vertical batten-style designs.
- Use a level to mark a true vertical or horizontal guideline before applying the first piece.
- Press each panel firmly along its full length, holding for the manufacturer's recommended time.
- Work outward from your first guideline piece, checking alignment every few pieces.
- Achieves a genuinely high-end, textural wood accent look
- No structural mounting or tools beyond a level required
- Significantly cheaper and faster than a built shiplap or batten wall
Search terms: "peel and stick wood wall panels," "adhesive wood batten strips," "self adhesive shiplap panels"
Fabric Backdrop Curtain Wall

The most dramatic accent wall in my entire apartment wasn't on a wall at all, technically, it was a full floor-to-ceiling curtain panel hung on a tension rod, covering an entire wall in soft, flowing fabric that changed the whole feel of the room.
- Measure the full wall width and choose a tension rod rated for that span, using a center support bracket for particularly wide walls if needed.
- Choose a substantial curtain fabric, heavier weaves hang with more visual presence than lightweight sheers for this specific use.
- Mount the rod near the ceiling line for maximum height impact, exactly as with window curtains.
- Steam the fabric after hanging to remove shipping creases for a fully finished look.
- Take down and store flat or rolled when it's time for a change, no patching or repair required.
- Covers an entire wall in color, pattern, and softness instantly
- Zero permanent wall contact beyond a tension rod's pressure points
- Easy to completely change the room's feel by swapping one panel
Search terms: "extra wide tension curtain rod," "heavy cotton curtain panel," "floor to ceiling curtain fabric"
A Renter's Damage-Free Toolkit
Keep these on hand before starting any of the nine projects above, having the right supplies ready prevents most of the common mistakes that cause damage:
- Rubbing alcohol and a cloth — cleans wall surfaces before any adhesive application for maximum hold.
- A small level — keeps tape patterns, panels, and hanging pieces genuinely straight.
- Museum putty — adds extra stability to leaning pieces without any wall damage.
- A hair dryer — gently warms stubborn adhesive for cleaner removal later.
- A plastic scraper or old credit card — smooths wallpaper and decals without scratching the wall.
- Painter's tape — marks placement guidelines before anything permanent-feeling goes up.
How to Remove Everything Without a Trace
Peel-and-stick wallpaper: peel slowly from a bottom corner at a low, wide angle, using a hair dryer on low heat for stubborn sections.
Adhesive strips and hooks: pull the stretch-release tab slowly and horizontally, never straight outward.
Washi tape: peel at a low angle; it's designed to release without residue in nearly all cases.
Vinyl decals: warm gently with a hair dryer before peeling to soften the adhesive.
Wood panels: follow the manufacturer's specific removal instructions closely, as adhesive strength varies by product.
General rule: always test your removal method on a small, hidden section first, even with products marketed as fully removable.
The Full Cost Comparison
| Idea | Typical Cost |
|---|---|
| Peel-and-stick wallpaper (one wall) | $40–120 |
| Tension rod + fabric | $20–60 |
| Command strip gallery wall | $15–40 (strips only) |
| Washi tape design | $10–25 |
| Leaning mirror or art | $20–100 |
| Vinyl wall decals | $15–50 |
| Macrame wall hanging | $10–45 |
| Adhesive wood panels | $50–150 |
| Fabric backdrop curtain | $25–80 |
| Typical project range | Most projects fall under $100 |
Common Questions
Will any of these actually risk my deposit? When applied correctly and tested first on a hidden section, all nine are designed specifically to avoid damage, though always check your specific lease terms, some are stricter than others about even temporary adhesives.
Which of these is fastest for a weekend project? Leaning art or a tension rod fabric panel can both be completed in under an hour, while peel-and-stick wallpaper and adhesive wood panels are better planned as a full afternoon project.
Can I combine more than one of these ideas on the same wall? Yes, a leaning mirror paired with a macrame hanging beside it, or washi tape combined with a gallery wall, often looks more intentional than any single idea alone.
What if I'm not confident doing this myself? Every idea on this list is designed to be beginner-friendly with basic tools; start with the lowest-commitment option (leaning art or a tension rod) before attempting adhesive wallpaper or wood panels.
A rental wall doesn't have to stay blank just because a lease says no paint and no nails. Every idea here proves the same point: a genuine statement wall was never really about permanence, it was always about intention.
Start with the one that costs you nothing to try this weekend, a leaning mirror, a folded tapestry over a tension rod, and let the wall become something you actually enjoy coming home to, deposit fully intact.
Shop the Story
- removable peel and stick wallpaper
- spring tension curtain rod
- heavy duty picture hanging strips
- wide washi tape rolls
- large leaning floor mirror
- removable vinyl wall decal
- large macrame wall hanging
- peel and stick wood wall panels
- heavy cotton curtain panel
- museum putty